
How to configure Texada Web to send emails through an external mail service such as Gmail or Microsoft Exchange.
This article is for enabling system emails in Texada Web. If you want to enable system emails in Texada SRM, please see “Configure SRM to Send System Emails”.
Quick Reference
- Texada Web has the ability to send emails directly from the system, through an external email service such as Gmail or Microsoft Exchange. This is a powerful feature that allows your team to send documents from Texada Web directly to your Customers without the use of an external program.
- In order to enable system emails, both Texada Web and your external email service need to be configured to allow communication between them. The nature of these configurations will change depending on the email service you use.
- It is highly recommended to set up a dedicated email address for use with Texada Web - for example, no-reply@abcrentals.com. This allows you to experiment with different settings without impacting your existing email addresses.
- To view configuration instructions for your email provider, use the links below:


Introduction
By configuring Texada Web with the necessary information from your existing email service, you can enable your Texada software users to send emails directly from the system. This is a powerful feature that allows your team to forward documents to your Customers without leaving Texada Web. For example, unpaid Invoices can be sent directly to the Customer from Texada Web, rather than manually downloading the Invoice and sending it through an external program.
In order to enable this feature, both Texada Web and your external email service must be configured to allow the two systems to communicate. The nature of these configurations will change depending on the email service you use. The following article will detail how to configure a number of popular email services to send emails through Texada Web.
Requirements
In order to enable the system email feature, you will need the following:
- An Texada Web account with access to the Company Settings menu.
- An external email address - either personally hosted (e.g. Microsoft Exchange), or hosted via 3rd-party (e.g. Gmail, Yahoo!, your website hosting company).
- Jasper Forms enabled on the server. Speak to a Texada Support representative for more information on enabling Jasper Forms if you are unsure about this setting.
It is highly recommended to set up a new, generic email address for dedicated use with Texada Web - for example, no-reply@abcrentals.com. This will allow you to safely experiment with a number of configurations without impacting any existing email addresses. This will also make it easier for your Customers and staff to distinguish between system-generated emails and personal emails.
Configuring Texada Web and Your External Email Service
The sections below contain instructions on configuring Texada Web and your external email service. The configuration process will vary depending on the email service you use; make sure to follow the instructions appropriate for your email provider.
 Gmail
Gmail
In Gmail:
- Navigate to mail.google.com and create a new email address to serve as the “From:” address in communications from your system. As this will be an unmonitored, send-only address, it is recommended to give it a name such as no-reply-abcrentals@gmail.com.
- From the Gmail inbox screen, navigate to Quick Settings (gear icon
 in the top-right corner) → See all settings → Forwarding and POP/IMAP.
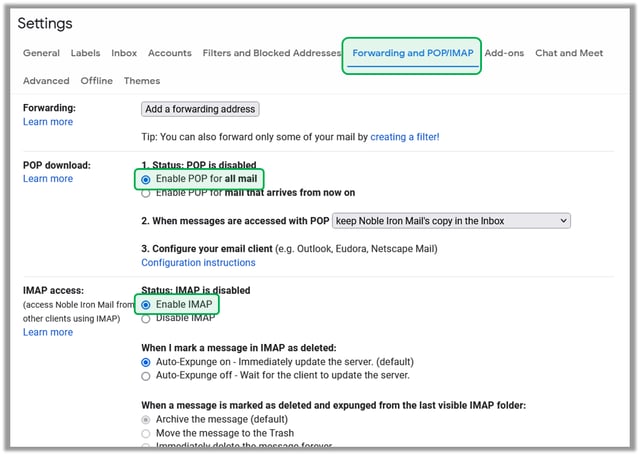
- On the “Forwarding and POP/IMAP” screen, select the following settings:
- Enable POP for all mail → Checked
- Enable IMAP → Checked
- Click “Save Changes”.
- Your no-reply email address is now ready to be added to Texada Web. Record the email address and password for this account; they will be needed when configuring Texada Web.
In Texada Web:
- Log in to Texada Web and open the User Menu by clicking on your name in the top-right corner of the screen. Then, navigate to Settings → Emails. Note that this screen will look different depending on whether or not an existing email configuration is present.
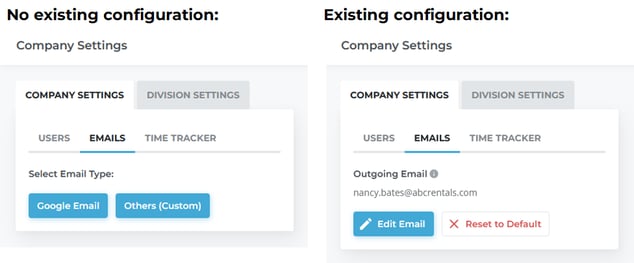
- Optional: If an outgoing email is already present, it is highly recommended to make a record of the existing configurations so that they can be restored in the event of any issues. To do this, select “Edit Email”, then record the information that is displayed.
- Select “Edit Email” (existing configurations only), then “Google Email”.
- A pop-up window will appear asking you to sign in to Google and give texadasoftware.com access to your Google account. Sign in using the no-reply address you created in Gmail, then click “Allow” to authorize the system to send emails on your behalf.
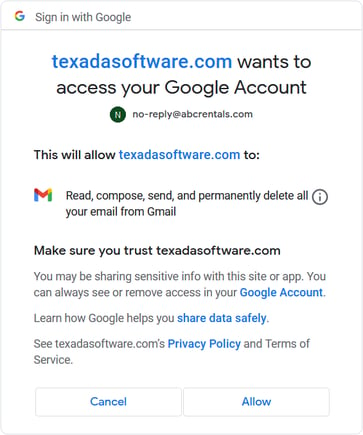
- A message that reads "Your email has been connected successfully!" will appear on-screen, and the pop-up window will automatically close. Texada Web is now configured to send system messages using the email address you provided.
 Microsoft Exchange
In Microsoft Exchange:
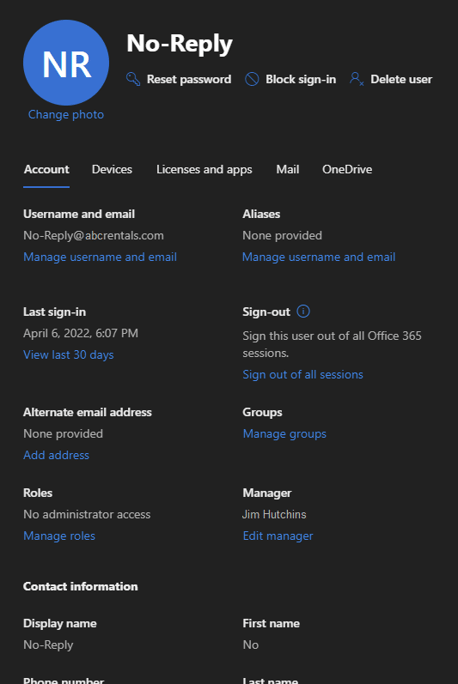
- Log in to Microsoft Exchange and create a new email address to serve as the “From:” address in Texada communications. As this will be an unmonitored, send-only address, it is recommended to give it a name such as no-reply@abcrentals.com.
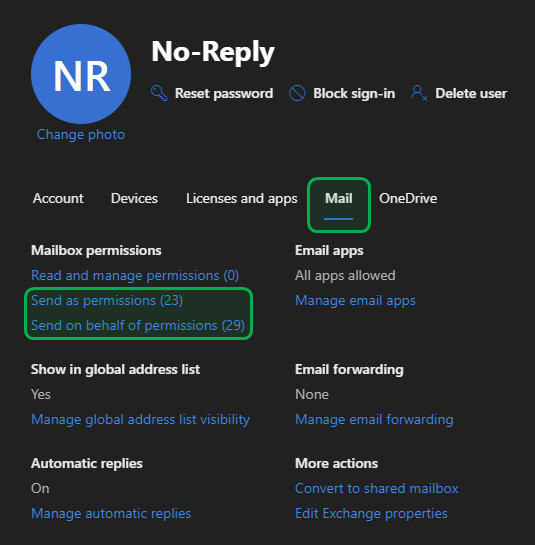
- Under the “Mail” tab of the new email address, locate the “Send as permissions” and “Send on behalf of permissions” options. These options allow you to specify other Exchange users which can send emails on behalf of this account. To these lists, add the email addresses of any Exchange users who will be using this address to send emails from Texada Web.*
- Also under the “Mail” tab, use the “Manage automatic replies” option to enable automatic replies, and create a message that customers will receive if they attempt to reply to an email sent by this account. The purpose of this automatic reply is to inform the customer that this mailbox is not monitored, and to provide an email address they can use to contact your team instead.
- Also under the “Mail” tab, click on the “Manage email apps” option to open a list of additional options. Ensure that “Authenticated SMTP” is enabled for all accounts that will be sending emails through Texada (both the no-reply address and any accounts that will be sending emails using this address).

- Your no-reply email address is now ready to be added to Texada Web. Record the email address and password for this account; they will be needed when configuring SRM.
*If you are still unable to send emails from Texada Web after configuring Microsoft Exchange, it is recommended to also add the no-reply address to the “Send as permissions” list for each of the Exchange users who will be sending emails from Texada Web. For example, if joe@abcrentals.com wishes to send emails through Texada Web, then no-reply@abcrentals.com should have Joe’s email under its “Send as permissions” list, and Joe should have no-reply@abcrentals.com under his “Send as permissions” list.
In Texada Web:
- Log in to Texada Web and open the User Menu by clicking on your name in the top-right corner of the screen. Then, navigate to Settings → Emails. Note that this screen will look different depending on whether or not an existing email configuration is present.
- Select “Edit Email” (existing configurations only), then “Others (Custom)” to display the email configuration options.
- Optional: Before making any changes to these options, it is highly recommended to make a record of the existing configurations so that they can be restored in the event of any issues.
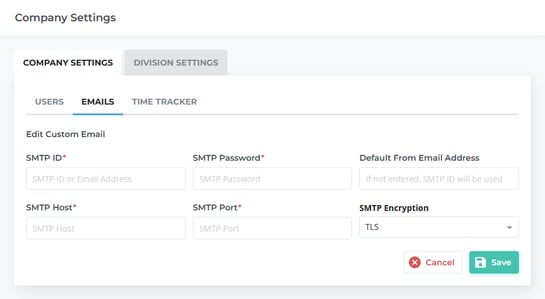
- Enter the following information on this screen:
- SMTP ID → [no-reply email address]
- SMTP Password → [no-reply password]
- Default From Email Address → [no-reply email address]
- SMTP Host → smtp.office365.com
- SMTP Port → 587
- SMTP Encryption → TLS
- Click “Save” to save your changes. Texada Web is now configured to send system messages using the email address you provided.
 Domain Email
In your website control panel:
- Log in to your website’s control panel and create a new email address to serve as the “From:” address in Texada communications. As this will be an unmonitored, send-only address, it is recommended to give it a name such as no-reply@abcrentals.com.
- Locate the SMTP information for your mailbox. This information can be found in various locations depending on your website’s host and control panel software. If you are unsure how to locate this information, contact your company’s IT or website administrator. You will need the following information to configure Texada Web:
- SMTP ID or email address (i.e. your email address)
- SMTP password (i.e. your email password)
- SMTP host (e.g. smtp.abcrentals.com)
- SMTP port (usually 25, 465, or 587)
In Texada Web:
- Log in to Texada Web and open the User Menu by clicking on your name in the top-right corner of the screen. Then, navigate to Settings → Emails. Note that this screen will look different depending on whether or not an existing email configuration is present.
- Select “Edit Email” (existing configurations only), then “Others (Custom)” to display the email configuration options.
- Optional: Before making any changes to these options, it is highly recommended to make a record of the existing configurations so that they can be restored in the event of any issues.
- Enter the following information on this screen:
- SMTP ID → [no-reply email address]
- SMTP Password → [no-reply password]
- Default From Email Address → [no-reply email address]
- SMTP Host → [your domain’s SMTP host address]
- SMTP Port → [your domain’s SMTP port]
- SMTP Encryption → TLS
- Click “Save” to save your changes. Texada Web is now configured to send system messages using the email address you provided.
Common Causes of Failure to Send Email
- Incorrect information for the email server is being used. Please confirm that all connection information is correct and try again.
- Some mail servers make use of a security firewall that can detect the attempt to send email through Texada Web as a malicious attack or spamming attempt. An exception would need to be allowed in the security software. Please contact Texada Software for a list of IP addresses that will need to be whitelisted on your mail server.
If you are still experiencing issues setting up email within Texada Web, please contact Texada Customer Support using one of the methods below:
Email: support@texadasoftware.com
Phone: 1-800-361-1233