
Provides a conceptual overview of the website navigation dashboard in ecommerce.
Type
Conceptual
Audience
GateWay Customer, Guest, Company Administrator, Salesperson
Products
GateWay ecommerce, customer access portal
In This Article
Body
Use the ecommerce dashboard to navigate through a company’s online store and browse their available equipment for sale and rent.
Sections of the dashboard
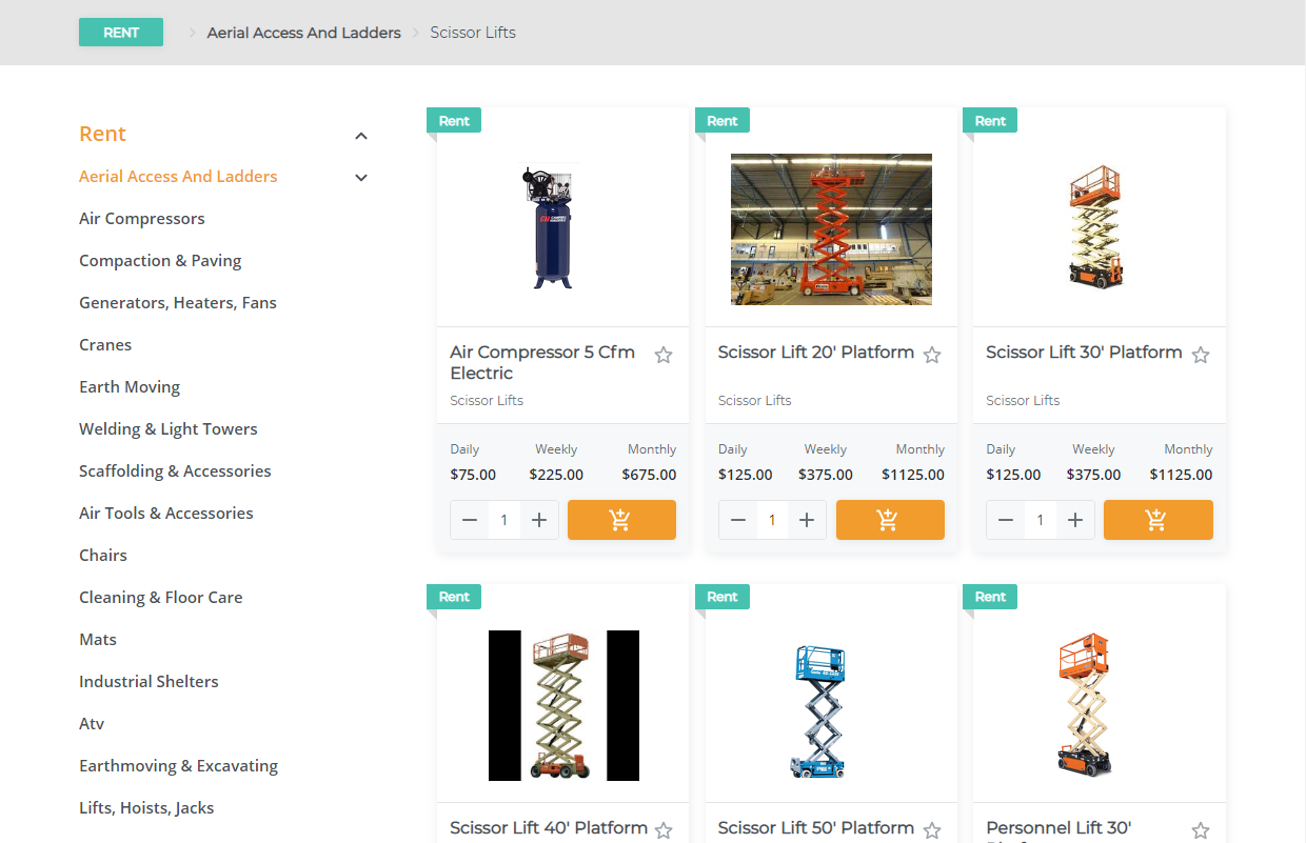
Use the following diagram to understand the different sections of the dashboard and their function:
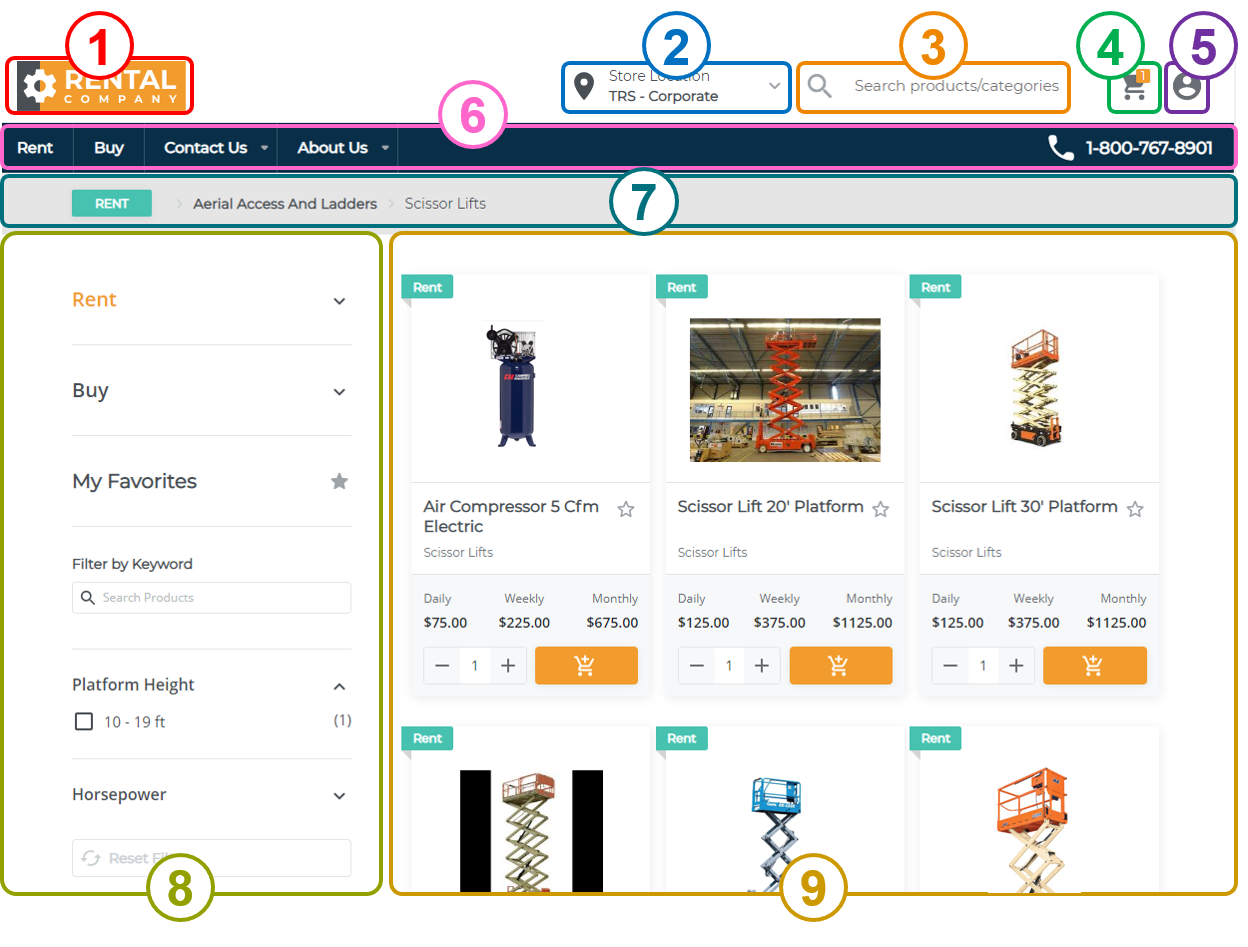
- Home button
- Click the home button to access the company’s ecommerce website homepage
- Store selector (where applicable)
- If the company has stores in multiple locations, you can use the store selector to choose the location that is applicable to you.
Note: It is recommended that you select the appropriate location in order to view accurate information about product availability at a location.
- If the company has stores in multiple locations, you can use the store selector to choose the location that is applicable to you.
- Search field
- Use the search field to search all products and categories at a particular location.
- Cart
- Click the cart to view the items you have added to your cart and/or proceed to the checkout.
Note: The number next to the cart icon indicates the number of unique items currently in your cart. Bulk items such as scaffolding only appear as a single item.
- Click the cart to view the items you have added to your cart and/or proceed to the checkout.
- User menu
- Use this user menu to access your account details, set your alerts, view your favorites, set up account settings, and log in and out of ecommerce
Note: If you are a company administrator user, you can also manage users and sites.
- Use this user menu to access your account details, set your alerts, view your favorites, set up account settings, and log in and out of ecommerce
- Header menu
- Use the header menu to navigate between the products for rent or purchase (where applicable), and the different pages the company has made available to you (where applicable).
Note: If the rent/buy menu options are enabled, clicking them is the equivalent of clicking the Rent or Buy menu options in the menu bar (see below) - You can click the company phone number to dial the company number from your mobile device (where applicable).
- Use the header menu to navigate between the products for rent or purchase (where applicable), and the different pages the company has made available to you (where applicable).
- Navigation bar
- Use the navigation bar to view your location in the company’s product listings catalog. In the example above, the user is looking at rental equipment, specifically products related to aerial access and ladders, specifically scissor lifts
Note: You can navigate backwards along the path in the navigation bar to view less specific information. In the example above, if you wanted to go back to see all rental equipment, you could click rent to return to a more general category.
- Use the navigation bar to view your location in the company’s product listings catalog. In the example above, the user is looking at rental equipment, specifically products related to aerial access and ladders, specifically scissor lifts
- Menu bar
- Use the menu bar to manually navigate the company’s product catalog.
- The menu bar functions similarly to other ecommerce websites, such as Amazon, where the menus, such as rent and buy expand or collapse, as you look at more specific categories and products.
- The menu bar contains a list of products you have marked as favorites.
- The menu bar contains any product filter options that are available for a specific category. In the example above, there are filter options for horsepower and lift height.
- Main area
- Displays the details of what you are currently doing in ecommerce, such as product search results, product details, user settings, your cart, favorites, and the checkout.
Navigate the menu bar
Use the menu bar to manually navigate through the company’s product catalog.
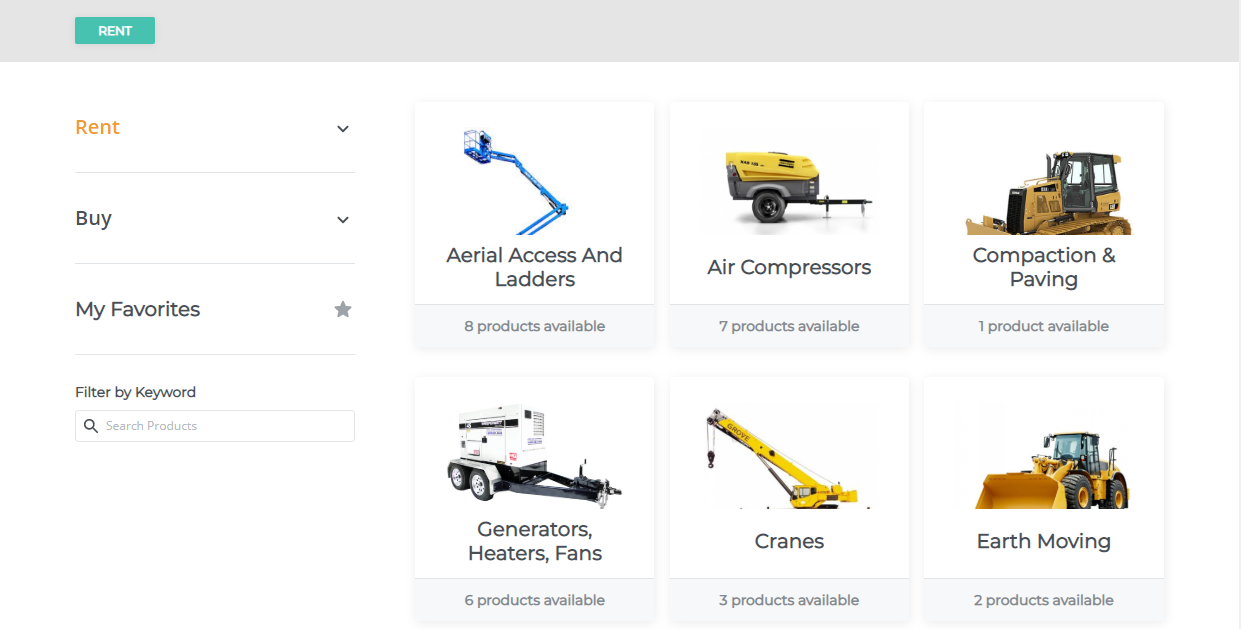
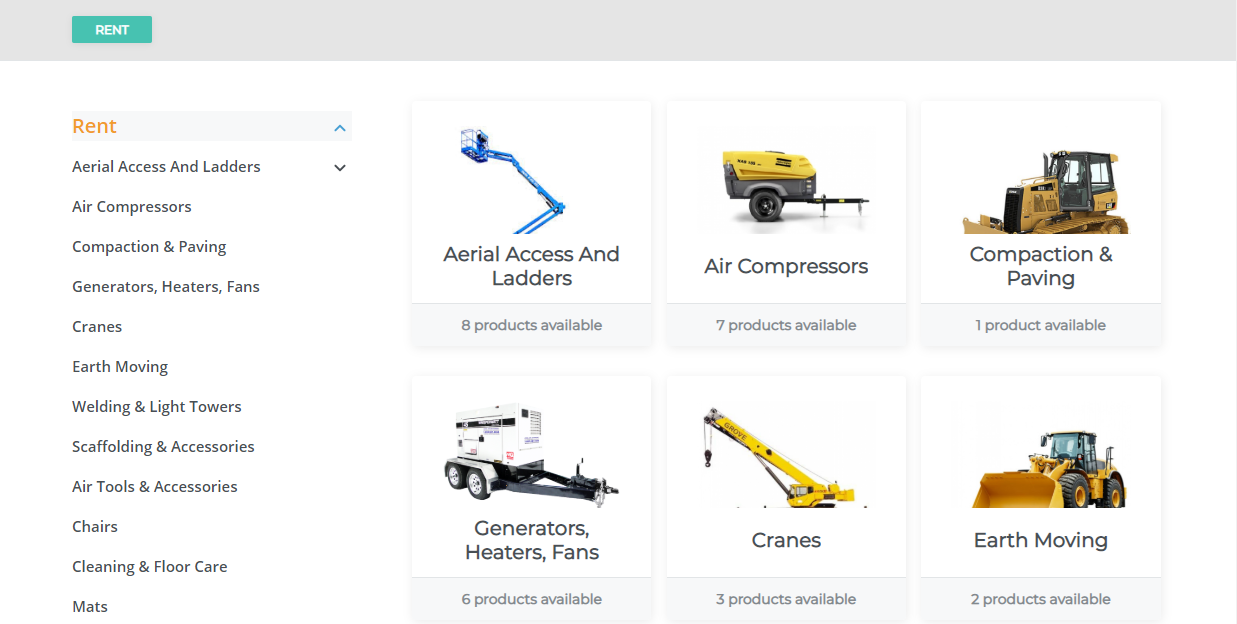
The menu bar consists of accordion style menus that expand or compress when you click the down or up arrow next to them. For example, clicking the Rent accordion menu expands the list to display all the categories of products that are available to rent.
Note: The Rent or Buy category may not be available on the site, depending on what the website administrator has enabled or disabled.
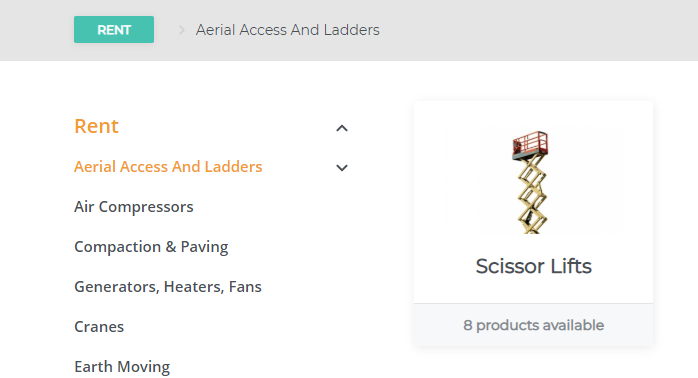
Categories with nested sub-categories also expand and compress when clicked. Clicking a category reveals any sub-categories nested within it in the menu bar. In this example, there is a category for aerial access and ladders. Nested under that category is the more specific scissor lifts sub-category.
When you click on a category with no sub-categories, or a sub-category, any product listings that are part of that (sub)category are displayed in a grid in the main area.
If a (sub) category has any attributes associated with any of the products within it, the attributes appear as filter options in the menu bar. In this example, one or more of the scissor lifts have the 40 - 55 ft and the 0 - 150 HP attributes associated with them.

Check a filter to only display products that have the checked filter attribute associated with them. In this example, only the 50 foot scissor lift fell within the 40 to 55 foot filter, and therefore only that lift is displayed in the main area.
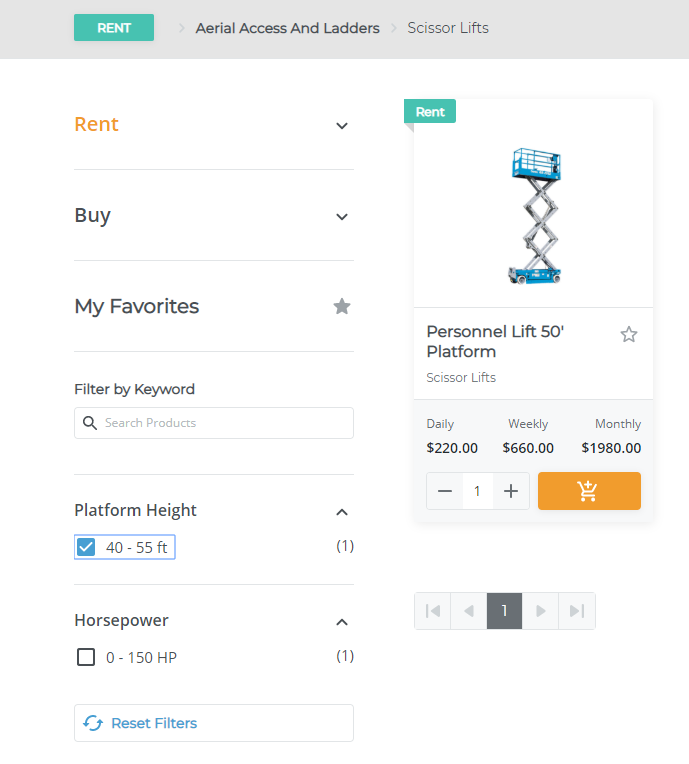
Note: See: “Create an Ecommerce Product Attribute in the Administration Panel” for more information on attributes.
Favorites in the menu bar
You can add any product listings to your favorites list. The favorites list is found in both the user menu, and the menu bar. Clicking favorites displays any products you have marked as a favorite in the main area.
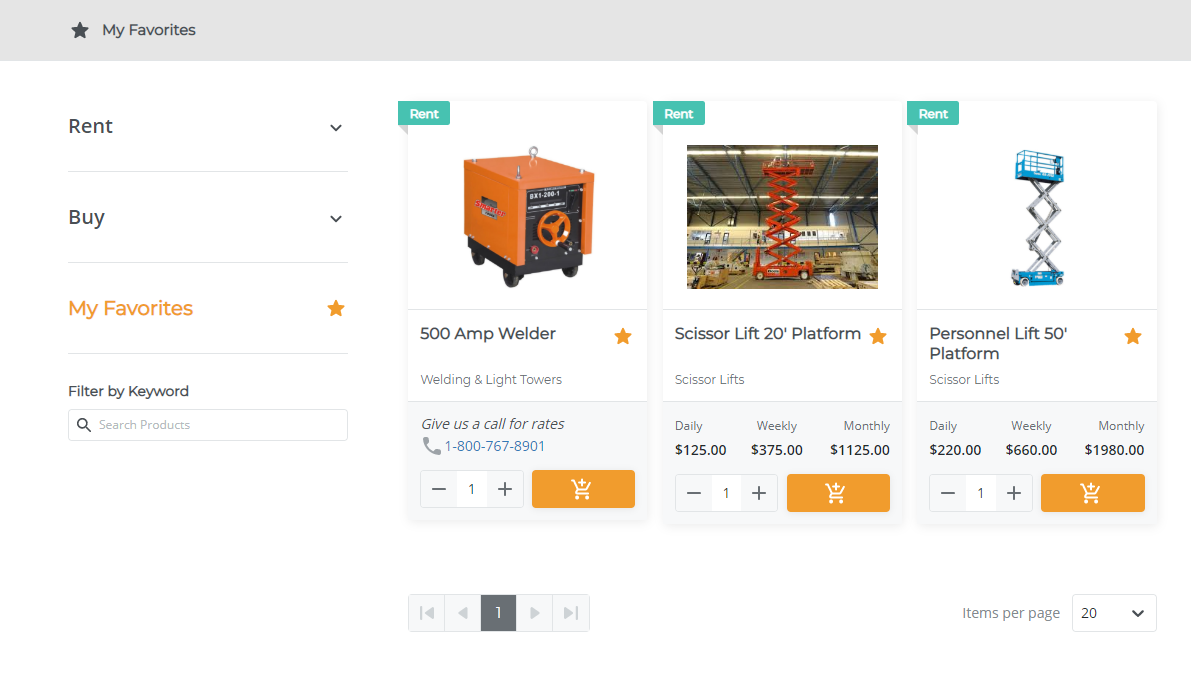
Note: See: “Add a Product to Your Favorites List in Ecommerce” for more information on favorites.
Navigation bar
As you drill down from transaction type to category to sub-category to product listing, the navigation bar displays your location in the catalog structure. The bar helps to prevent you from becoming lost in multiple categories and sub-categories.
In the example below, the customer is browsing items to rent, and looking at the Aerial Access and Ladders category, and the Scissor Lifts sub-category.
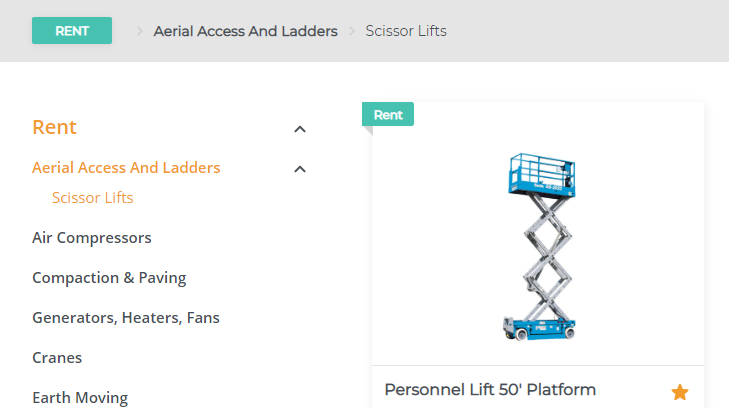
At any time, the customer can click the locations in the navigation bar to return to that part of the catalog. For example, if the user needed to return to the Aerial Access and Ladders category to look at a different type of lift, they could click on the navigation bar to return to the category.