
In This Article
Introduction
The following article describes the process of configuring Microsoft Entra ID for integration with the Texada Identity Service (TIS). This process involves making several configurations via the Microsoft Entra ID portal, and then providing Texada with the information it needs to complete the integration.
If you are unsure which IdP to use, Texada’s recommendation is to use OpenID Connect or Microsoft Entra/Azure (this article), followed by SAML if the first two options are unavailable.
Configure Microsoft Entra ID
To configure Microsoft Entra ID for use with TIS, follow the steps below.
Create a New Application
The service previously known as the Azure Active Directory is now called Microsoft Entra ID.
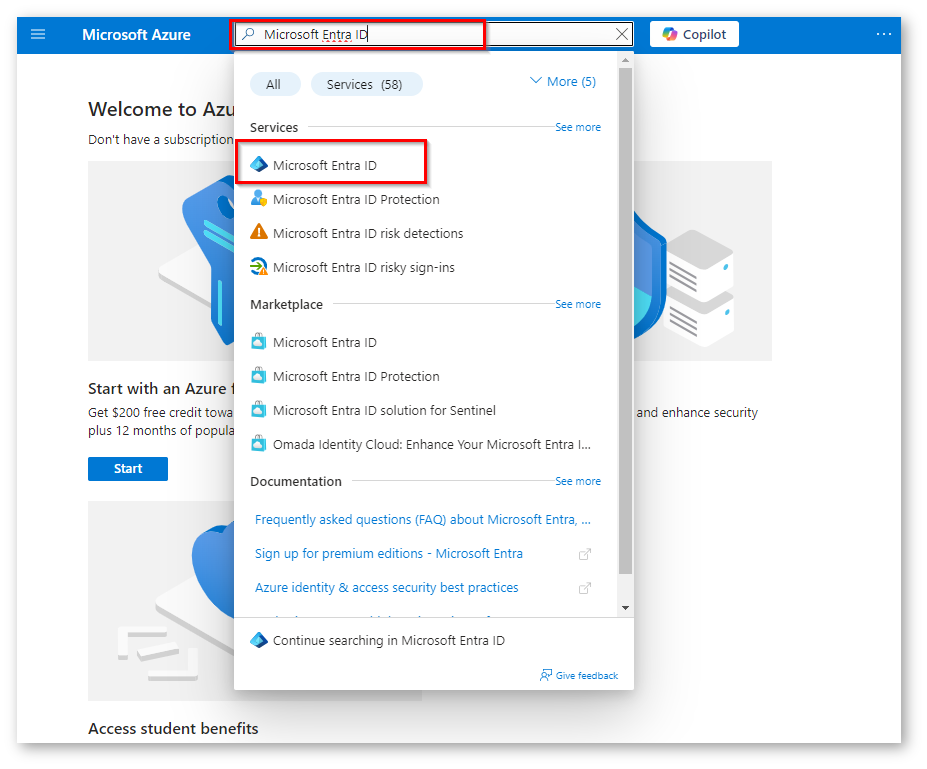
- Log in to Microsoft Azure (https://portal.azure.com) with an account that has permission to manage Azure Active Directory.
- Find Microsoft Entra ID from the left menu or from All Services.
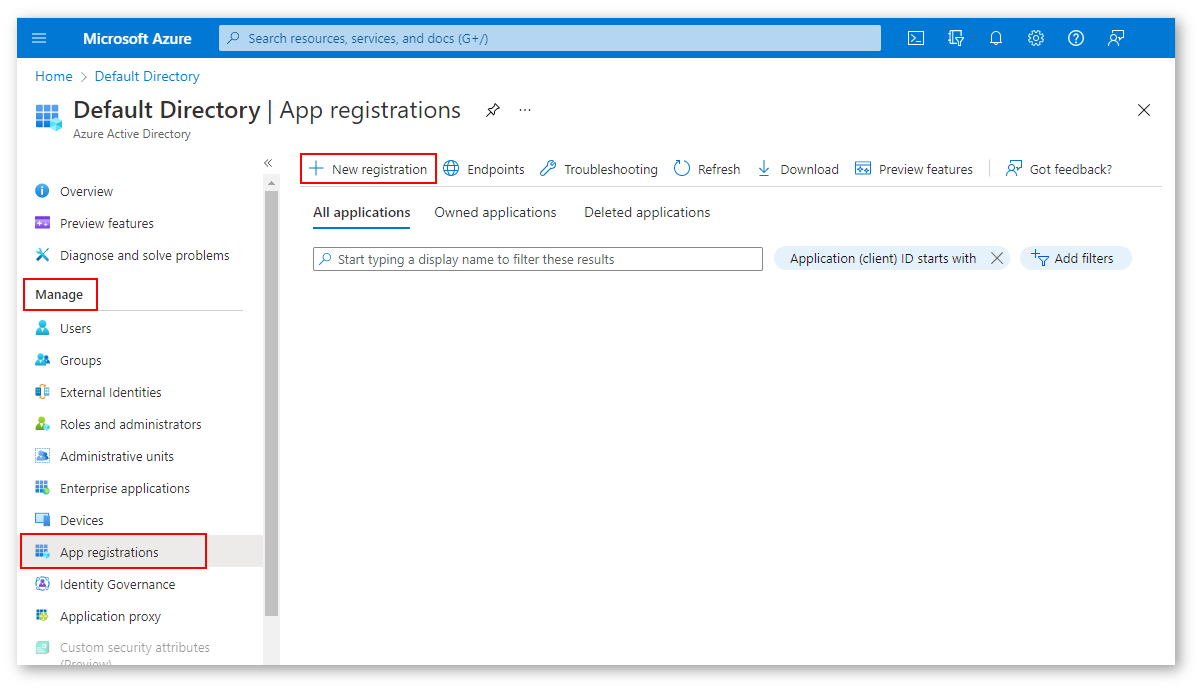
- Select App registrations under Manage in the left navigation panel. Click the “+ New registration” button to add a new application.
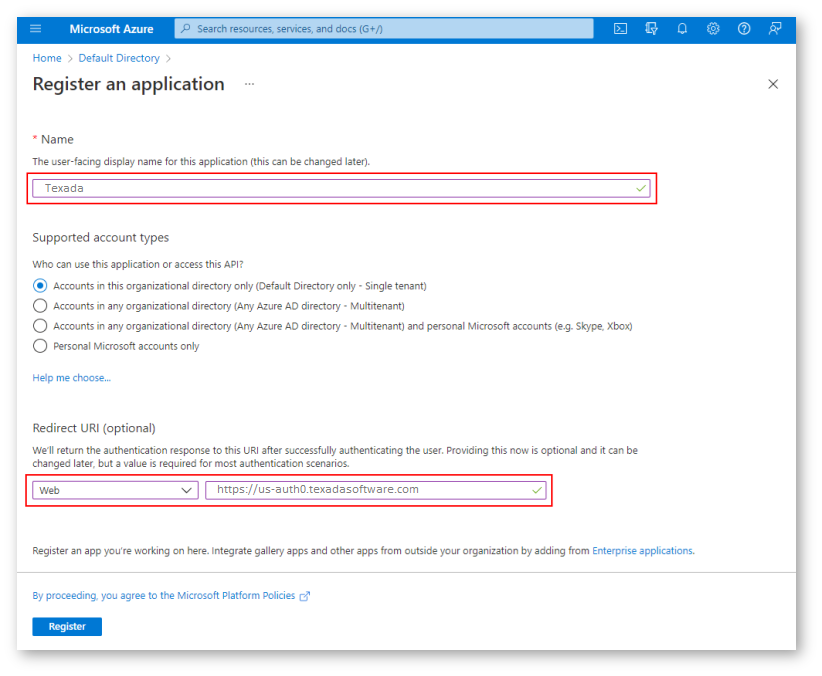
- Make the following changes to the Register an application screen:
- Choose and enter a name for the application (e.g. “Texada”).
- Under the Redirect URI section, select Web as the Platform.
- Enter your Redirect URI. This will change depending on your organization’s region:
- North America: https://us-auth0.texadasoftware.com
- Europe: https://eu-auth0.texadasoftware.com
- APAC: https://au-auth0.texadasoftware.com
- Click “Register” to save your changes.
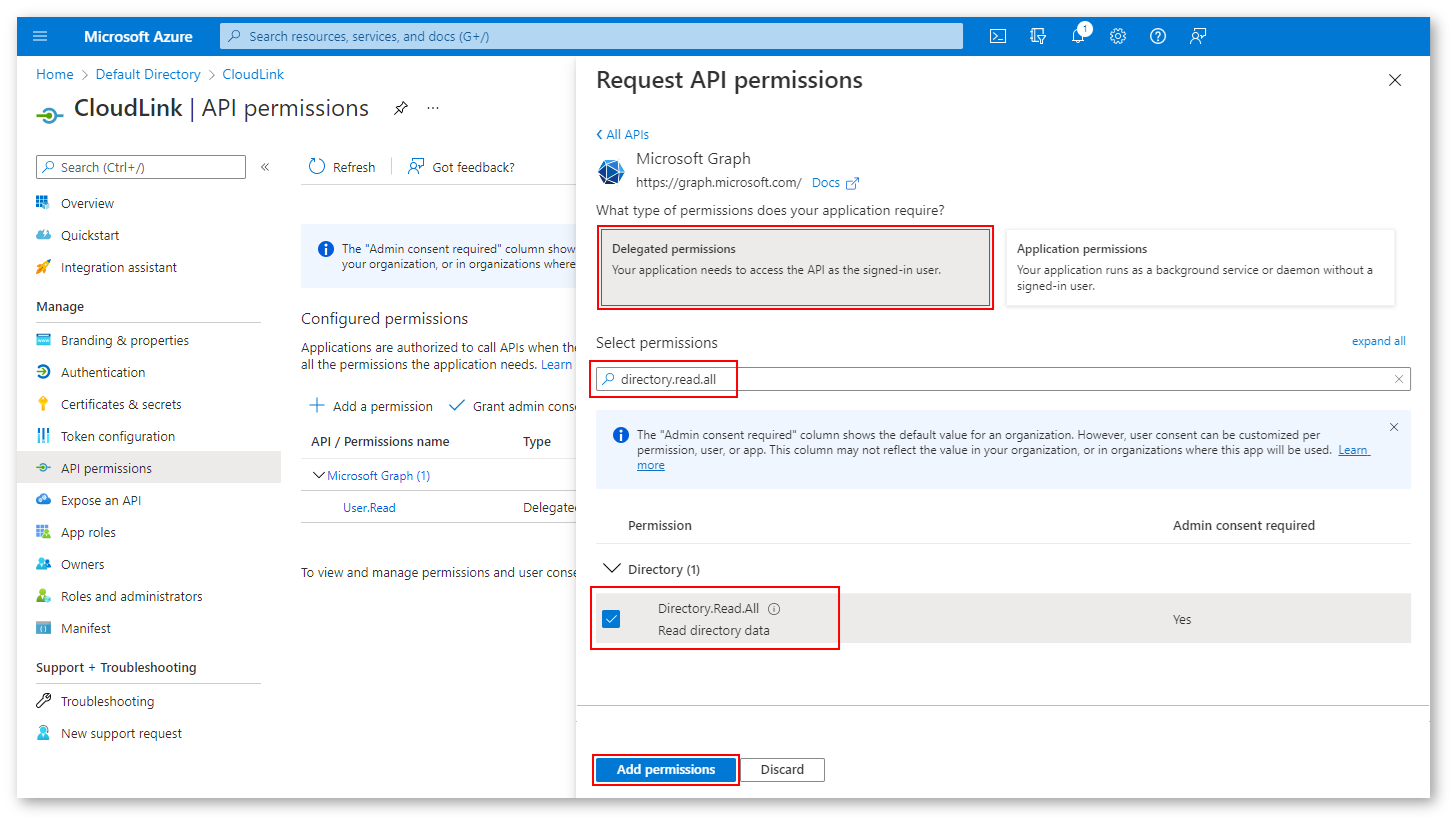
Configure Permissions
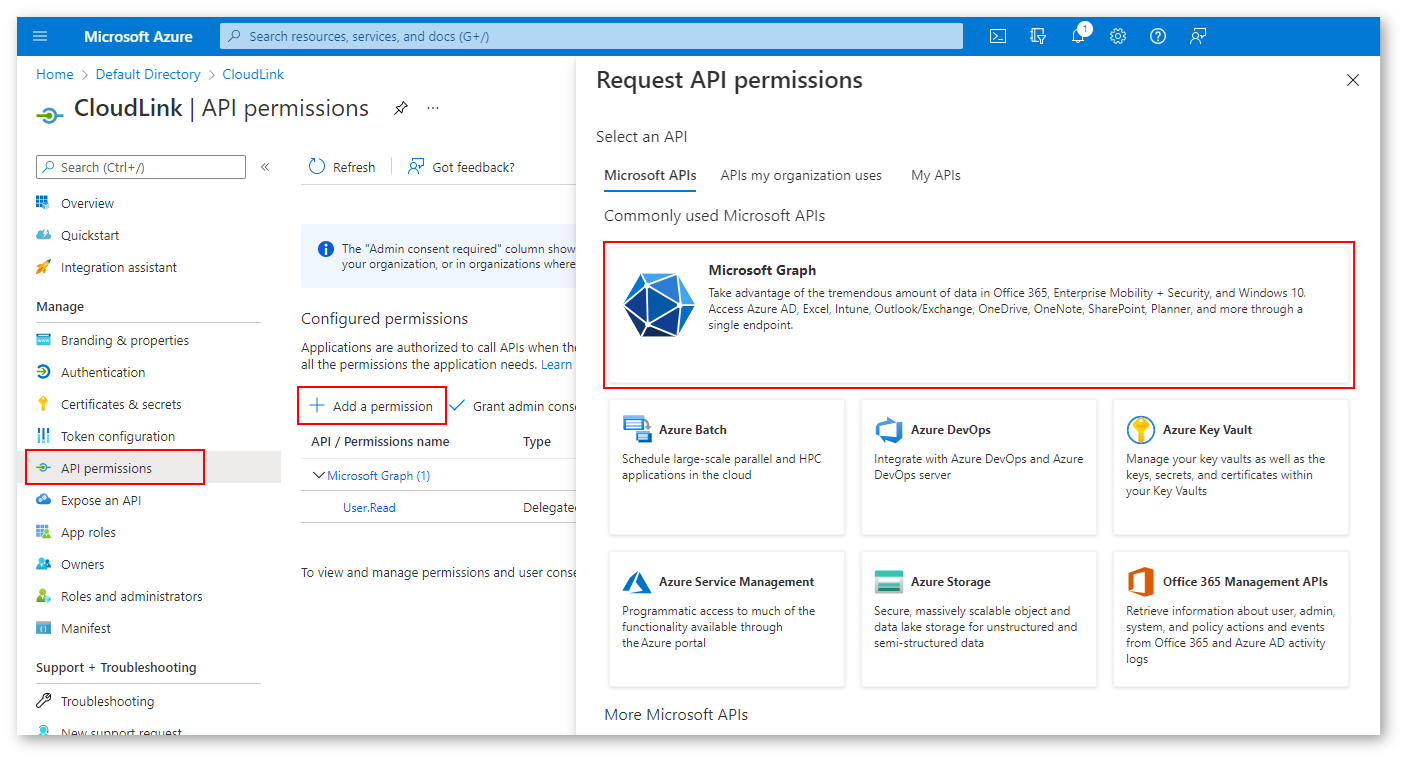
- Select API permissions from the left navigation menu.
- Click the “Add a permission” button, then select Microsoft Graph.
- Click on Delegated permissions. Search for “directory.read.all” under Select permissions, then select it and click “Add permissions” to save your changes.
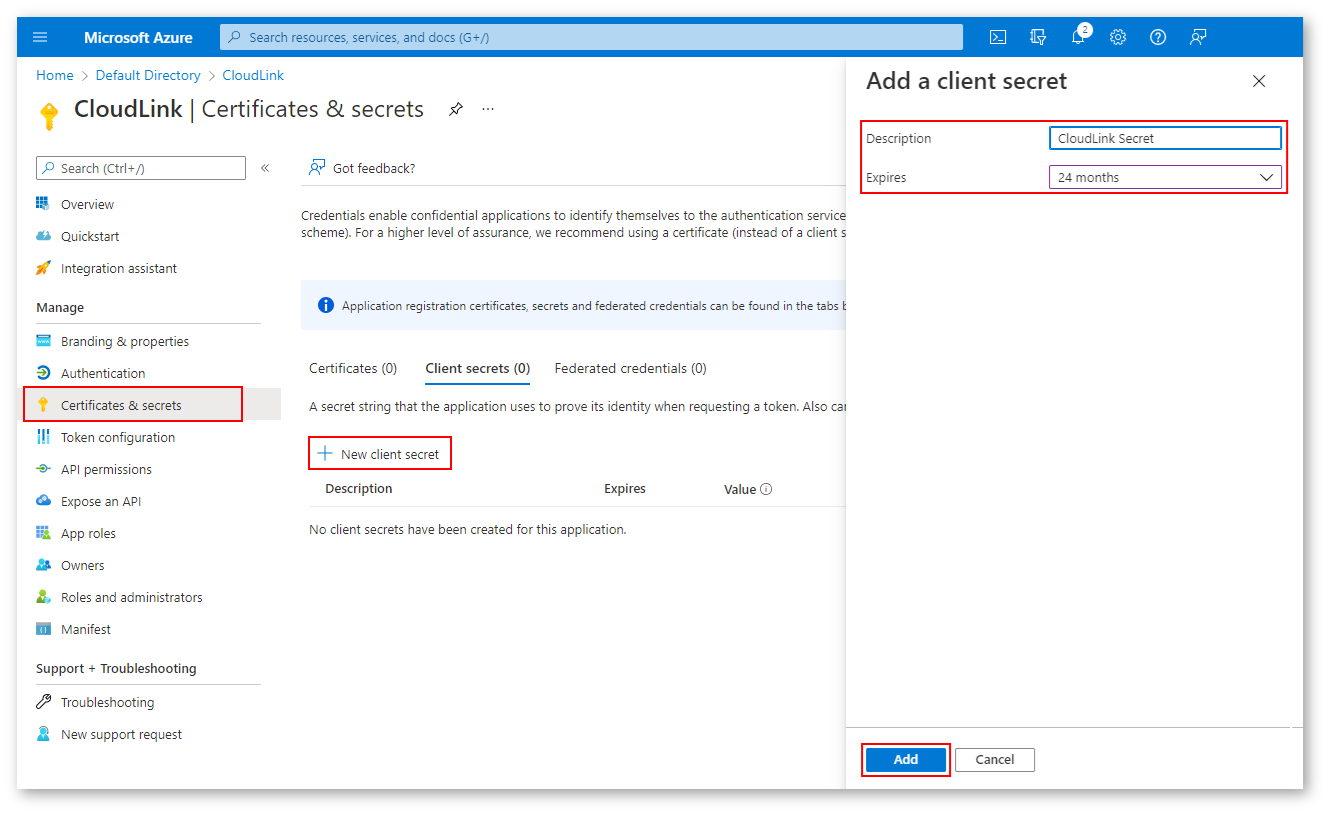
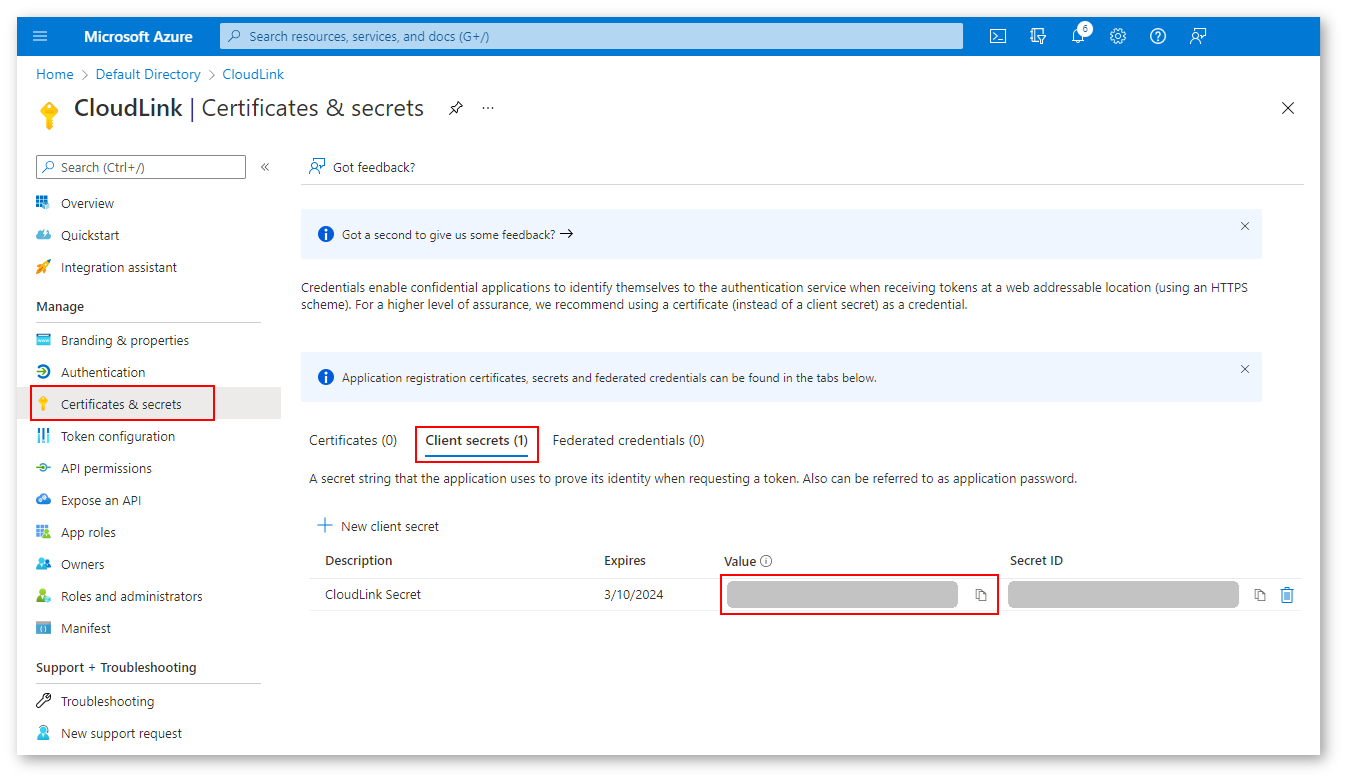
Create Client Secret
- Select Certificates & secrets from the left navigation menu, then click the “+ New client secret” button.
- Enter a description for the key, choose the desired expiry, and click Add.
- After saving, the key value will be displayed. Make sure to record the key value and expiration date before leaving this screen; otherwise, you may need to create a new key. You will need to send this information to Texada once configurations are complete; see “Provide Information to Texada Software” for more information.
We also recommend recording the expiration date in your own calendar, as you will need to renew the key before that date.
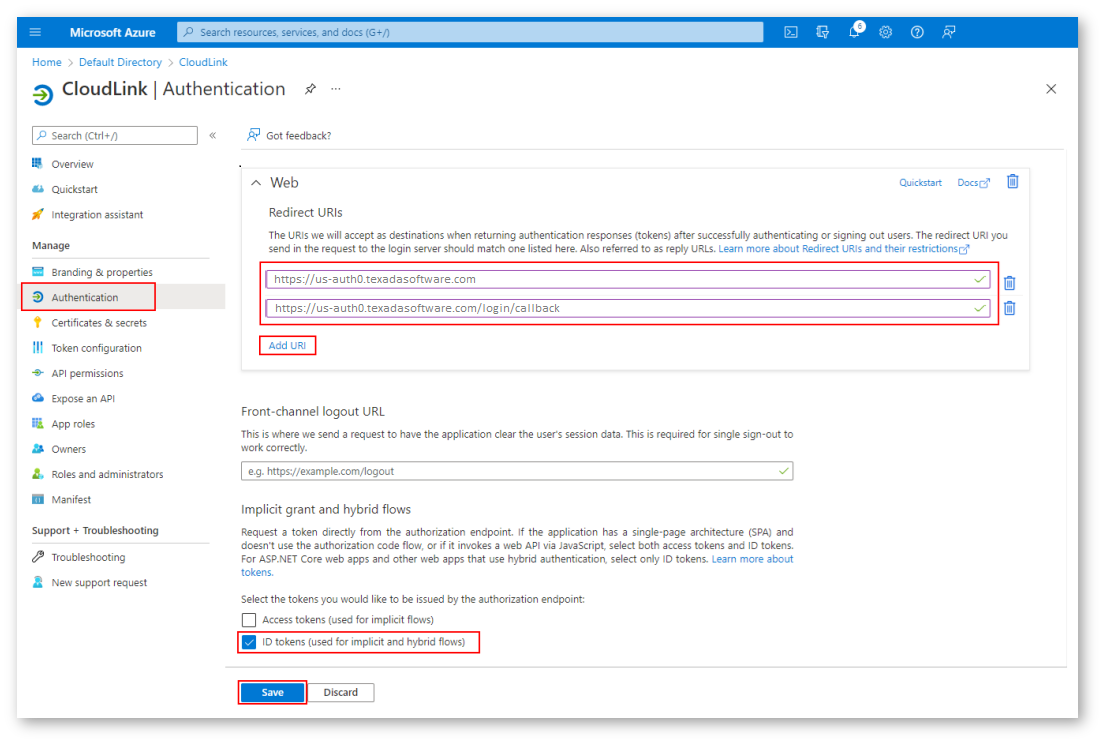
Configure Redirect URIs
- Select Authentication from the left navigation menu.
- Click the “Add URI” button, then add your login callback URIs. These will change depending on your organization’s region:
- North America:
- https://us-auth0.texadasoftware.com/login/callback
- https://texada.us.auth0.com
- https://texada.us.auth0.com/login/callback
- Europe:
- https://eu-auth0.texadasoftware.com/login/callback
- https://texada.eu.auth0.com
- https://texada.eu.auth0.com/login/callback
- APAC:
- https://au-auth0.texadasoftware.com/login/callback
- https://texada.au.auth0.com
- https://texada.au.auth0.com/login/callback
- North America:
- Check the “ID tokens (used for implicit and hybrid flows)” option under “Implicit grant and hybrid flows”.
- Click Save to save your changes.
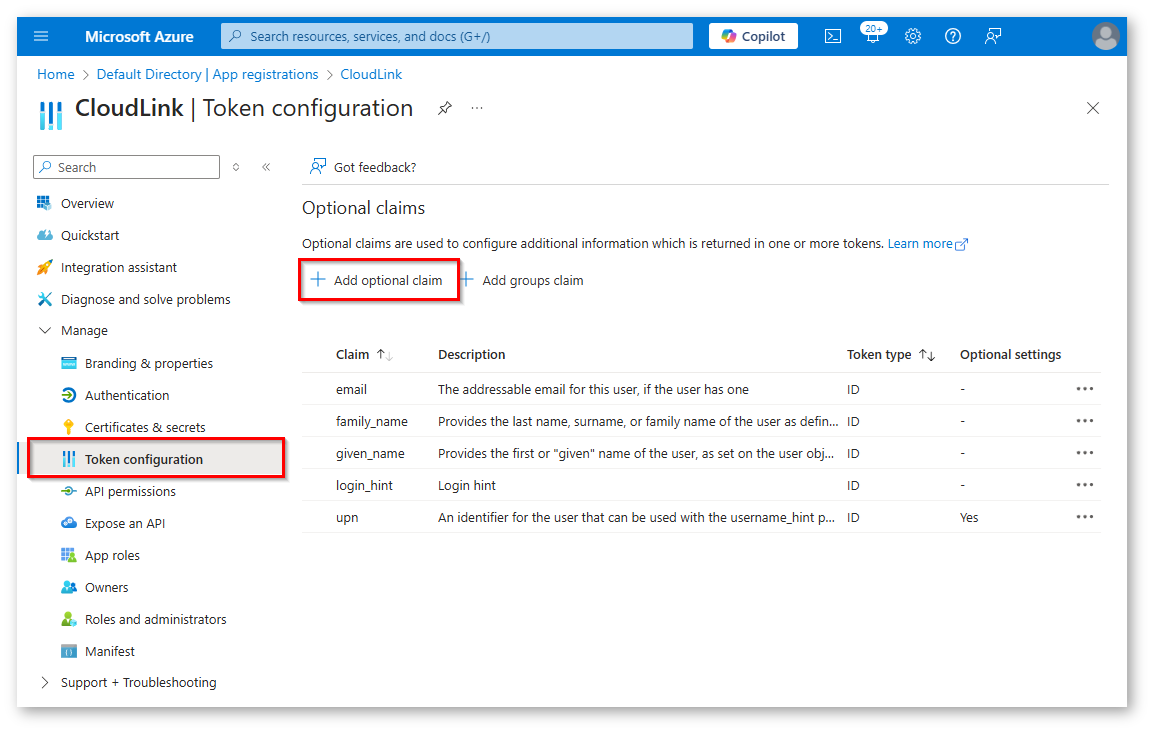
Configure Optional Claims
- Select Token configuration from the left navigation menu.
- Click the “Add optional claim” button, then select the following 5 claims:
- family_name
- given_name
- Login_hint
- upn
Provide Information to Texada Software
Please securely provide the following information to Texada Software through Keeper Vault. A free account can be created here.
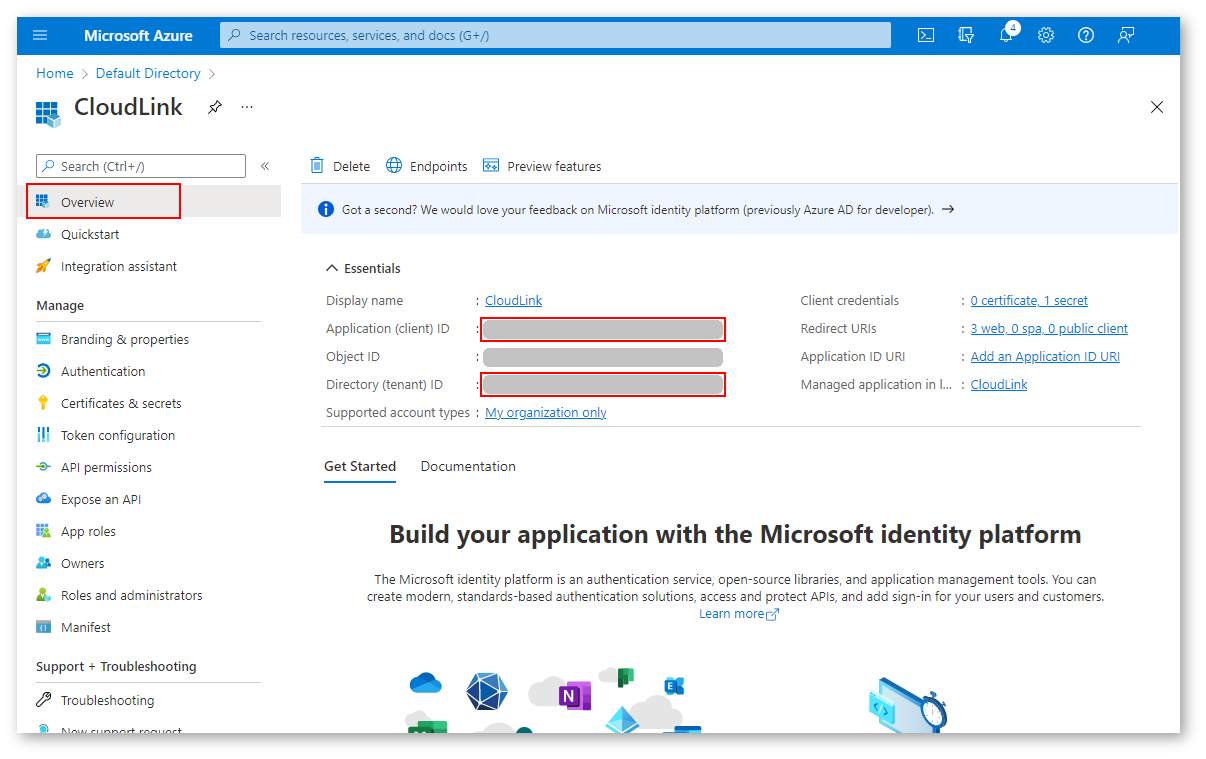
- Application and Directory IDs:
- Client secret value (previously saved after creating the client secret) and the expiry date:
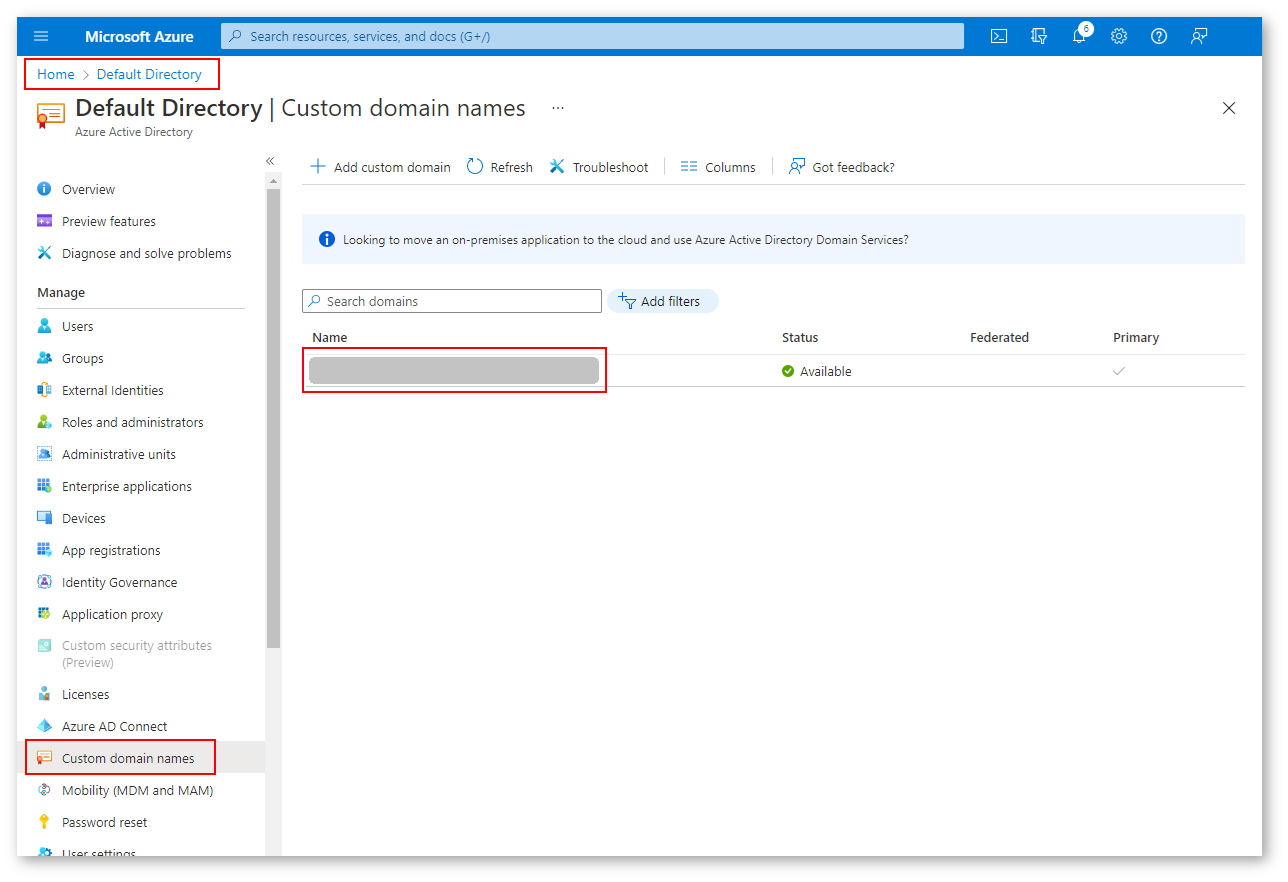
- Custom domain names:
- Domain Aliases (if any).
- 2 accounts to be used to test the connectivity without MFA, preferably named as below. These accounts are temporary and will be dropped once the migration is complete.
- user1@yourdomain.com
- user2@yourdomain.com
Appendix A: Field Mapping
This appendix explains how your Identity Provider (IdP) user attributes (such as email, first name, and last name) should be mapped to Texada Identity Service (TIS) fields so users can sign in successfully and appear correctly in Texada products.
|
Texada field |
SSO field |
|
|
emailaddress / email |
|
firstName |
firstName / given_name / first_name / username |
|
lastName |
lastName / family_name / last_name |
|
title |
job_title / title |
|
company |
company |
|
manager |
manager |
|
address |
address / street |
|
city |
city |
|
country |
country |
|
office |
office / physical_delivery_office_name |
|
department |
department |
|
province |
state_province / state / st |
|
mobile |
mobile / mobile_phone / mobilePhone |
|
employeeId |
employee_id / employeeid / employeeId |
|
postalCode |
postalCode / postal_code |
|
homePhone |
homePhone / home_phone |
|
officePhone |
phone / office_phone / telephoneNumber |
Once you have created the app registration, you will need to change the Accepted Mapped Claims flag to true. This can be done under “Manifest” in the app registration.
