Clock In and Out of Texada Web
Describes how to set yourself as either clocked in or clocked out in Texada Web.
Type
How to
Audience
All
Products
Texada Web
In This Article
Context
Clock in to Texada Web when your work shift begins and clock out when it ends to ensure your work hours are recorded accurately.
You can clock out either by using the clock out functionality or by logging out of Texada Web, but you can only clock in by using the clock in functionality.
You can update your clock in/out information retroactively if you forgot to clock in/out and need to add this information for recording purposes.
Before You Begin
Required: Internet connection; valid Texada Web login credentials and access permissions; existing driver or technician
Optional: Mobile device with an Internet connection
Steps
Clock In
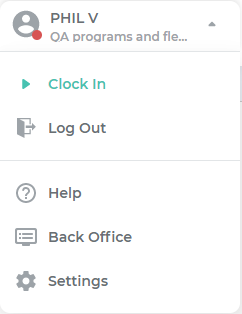
- In the Texada Web dashboard, navigate to the personal profile

The user option drop-down opens
- Click Clock In
You are clocked-in
Your start time is registered in Texada Web
Clock Out
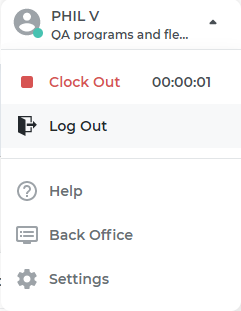
- In the Texada Web dashboard, navigate to the personal profile

The user option drop-down opens
- Do one of the following:
- Click Clock Out
- Click Log Out
Your end time is registered in Texada Web
Set a Clock In/Out Retroactively
- In the Texada Web menu bar, navigate to Time Tracker
The list of clock ins and clock outs opens in the main area - Click Add New
A new entry is added to the list of clock ins and outs
- Use the Select Operator drop-down to select the operator the clock in/out applies to
- Type or use the calendar menu in the Start Time column to select the date and time of the clock in
- Type or use the calendar menu in the End Time column to select the date and time of the clock out
- Click Confirm
The retroactive clock in/out is added to the list of clock ins and outs
.png?width=365&height=50&name=Texada%20Logo%20(Black).png)