.png?width=365&height=50&name=Texada%20Logo%20(Black).png)
In This Article
- Introduction
- Key Aspects of Allowances
- Functions
- User Functionality and Security Roles
- Allowance Interface and Related Labor Summary
- DBS Integration
- Step-by-Step Instructions for Using Allowances in ServiceLink
- Enabling Allowances
Introduction
In Texada ServiceLink, allowances refer to a system that allows technicians to claim various daily allowances based on the work they perform. These allowances can then be approved within ServiceLink and sent to Dealer Business System (DBS) for payment processing.
Key Aspects of Allowances
- Origin: Allowances originate in ServiceLink.
- DBS Integration: Allowances are sent to DBS for payment processing, but are not tied to specific Work Orders.
- Attributes: Each allowance includes the following attributes: Technician, Date, Allowance Type, Quantity (which can include decimals), and a Comment.
- Statuses: Allowances can have one of three statuses: Pending, Approved, or Rejected.
Functions
Managing technician allowances in ServiceLink involves three separate functions:
- Entering new and editing non-approved allowances.
- Approving and rejecting allowances.
- Viewing allowance history.
User Functionality and Security Roles
The functionality for managing allowances is controlled by security matrix settings configurable by the dealer.
- Technicians are typically restricted to managing only their own allowances.
- Supervisors can view allowances for technicians associated with their approval groups.
- Certain roles may have the ability to select other approval groups to view allowances over a wider range.
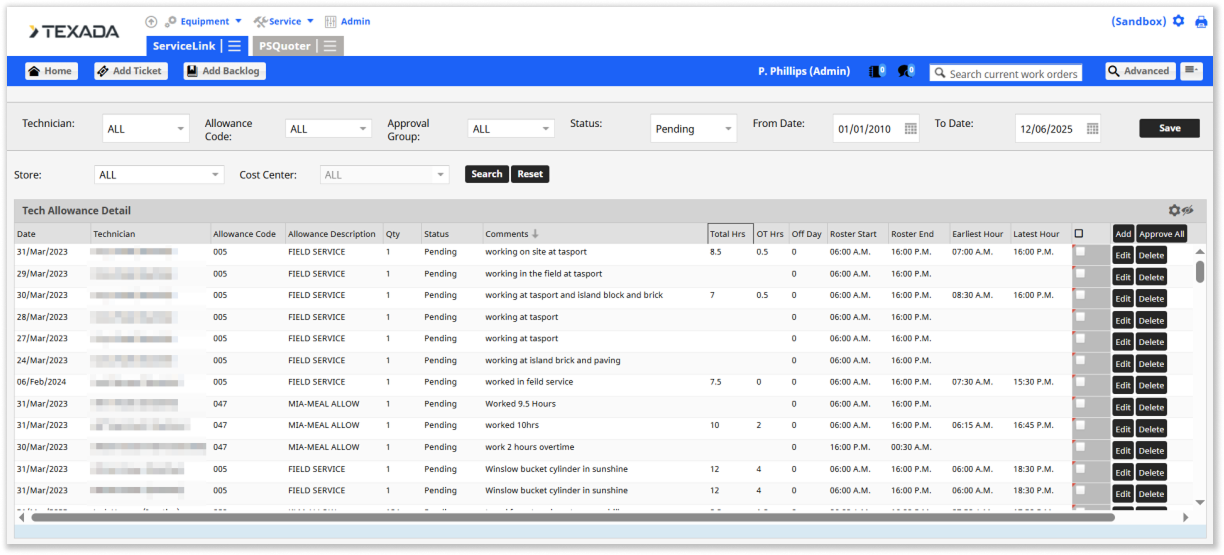
Allowance Interface and Related Labor Summary
When viewing allowances, the result grid displays fields such as Date, Technician, Allowance Code, Quantity, and Status (Pending, Approved, Rejected, Comment). To assist in the decision-making process for approving or rejecting allowances, ServiceLink also provides a summary of the technician's labor entries for the same day, including:
- Total labor hours (including pending, approved, and rejected hours).
- Overtime hours (total overtime hours regardless of type).
- An Off Day indicator (if the date was an off day according to the roster).
- Roster Start/End times for that date.
- Earliest/Latest labor hours entered for the date.
DBS Integration
Once allowances have been entered, they will be sent to DBS. All DBS integration is accomplished using the Accenture APIs, and the allowance table in DBS is a custom table not included in the current API. The DBS integration includes:
- Reading in the allowances types from DBS.
- Updating the approved allowances to DBS.
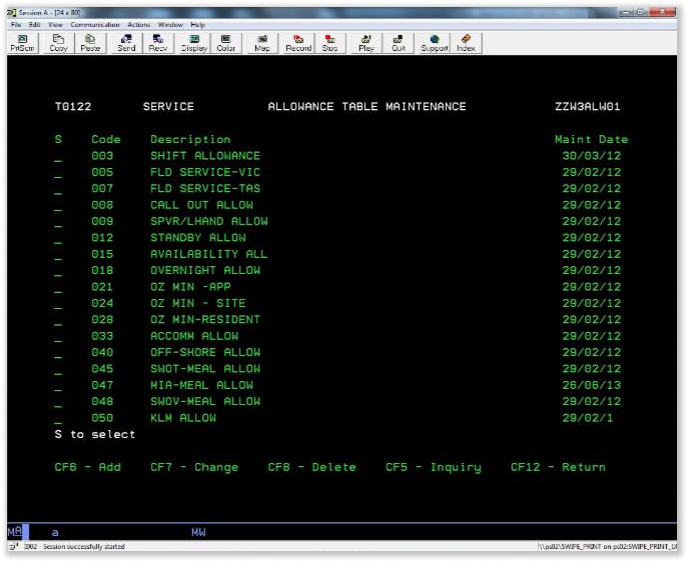
Here is an example of a DBS list of allowance types:
Step-by-Step Instructions for Using Allowances in ServiceLink
Enter a New Allowance (for Technicians)
Technicians will typically see their own allowances that are either pending or rejected.
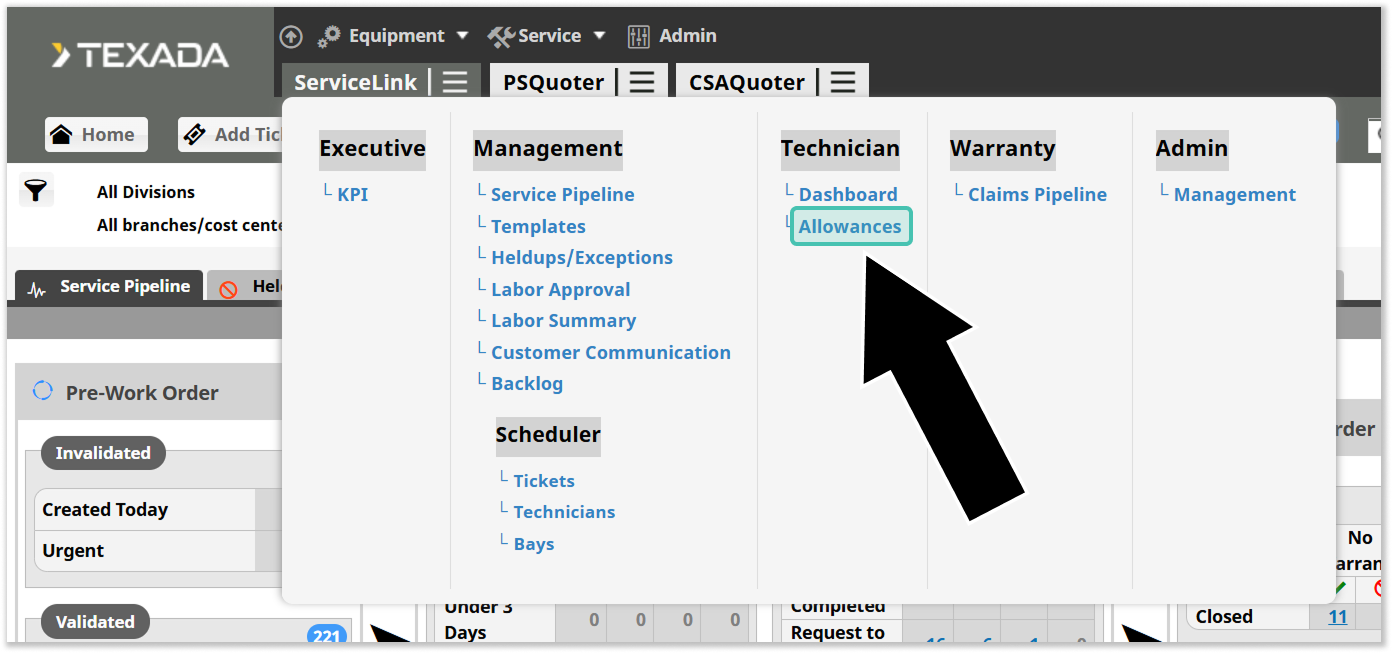
- Click the hamburger menu icon
next to “ServiceLink” in the top menu, then select “Allowances”.
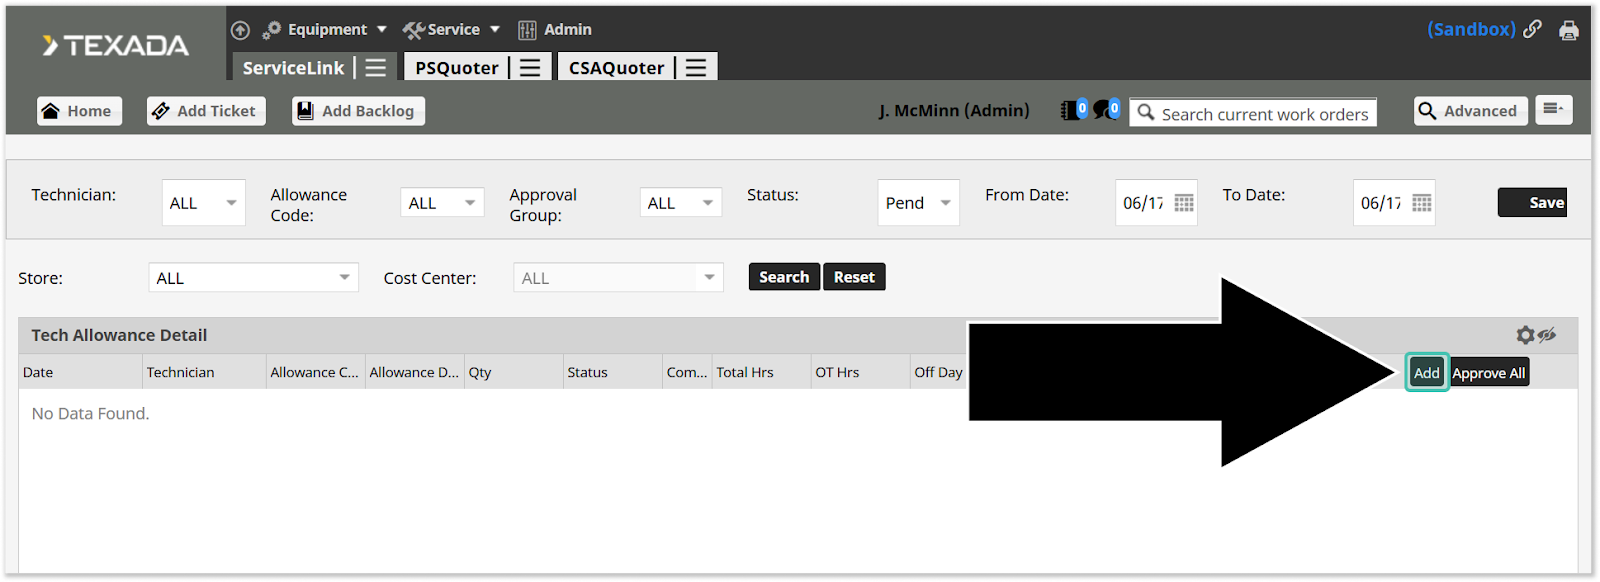
- Click the "Add" button.
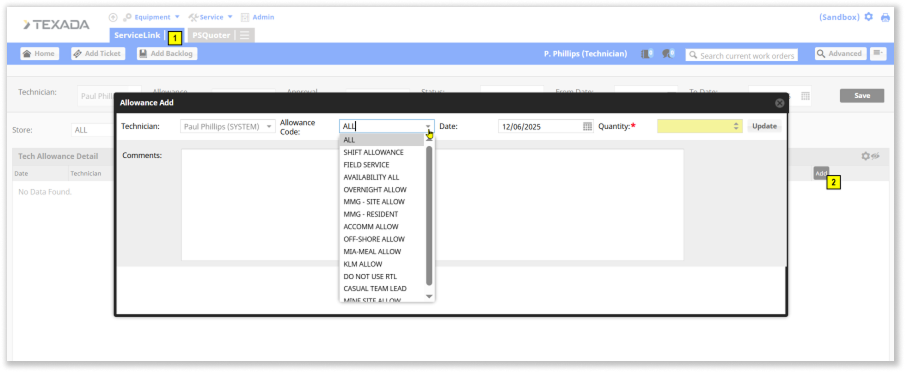
- In the pop-up window that appears, fill in the Date, Allowance code, Quantity, and Comment.
- Click "Update".
- The new allowance will now be visible in the allowance list with a "Pending" status.
Edit Non-Approved Allowances
Once an allowance is entered, an "Edit" button will be visible for that row, allowing the user to modify the entry as long as its status is either pending or rejected.

Approving/Rejecting Allowances (for Supervisors)
When the person responsible for approval opens the allowance page, their assigned approval group and a default "Pending" status will be selected.
- Click the hamburger menu icon
- Review each item in the list. You can use the related labor summary fields to verify the allowance's correctness.
- To approve an allowance:
- Click the "Approve" button on each individual allowance entry.
- Alternatively, you can select multiple entries by clicking the checkbox next to them and then pressing "Approve All".
- To reject an allowance:
- Click the "Reject" button on each entry.
Important: Once an allowance is approved, it cannot be modified.
DBS Integration upon Approval
Once "Approve" or "Approve All" is pressed, the allowance information is sent to DBS.
- Any DBS update errors will be shown to the user, and if errors occur, the allowance will remain in "Pending" status.
- If an allowance is rejected, it will not be sent to DBS, and its status will update to "Rejected".
- Technicians will see rejected allowance entries on their page.
Enabling Allowances
Dealers can enable this feature by setting specific security keys and config keys. For more information, see “Manage Configuration Keys”.
- Technician.Allowance.Approve allows a user to approve or reject technician allowance requests.
- Technician.Allowance.Delete allows a user to delete any pending or rejected allowance requests.
- Technician.Allowance.Create allows a user to create allowance requests for other technicians.
- The Allowance menu item under ServiceLink → Technician can be shown or hidden.