How to use the Role Manager in Texada Web to create, clone, edit, and delete User Roles.
Quick Reference
- A User Role is a set of permissions that can be assigned to a User to give them access to various features throughout Texada SRM, Web, and Mobile.
- The Role Manager is a utility found in Texada Web that allows you to manage the User Roles in your system, including editing, cloning, deleting, and creating new Roles.
- To access the Role Manager, click the blue button with three vertical dots
 found on the following pages:
- Company Settings → Permissions: Near the top-right corner of the page.
- Company Settings → Roles: Near the top-right corner of the page.
- Create User Screen: In the top-right corner of the User Permissions panel.
- Edit User Screen: In the top-right corner of the User Permissions panel.
- The Role Manager offers the following options:
- Clone: Create a new User Role using an existing Role as a starting point.
- Create: Create a new User Role from scratch.
- Edit: Modify a User Role.
- Delete: Delete a User Role.
- When deleting a User Role, select the “Reassign” option to assign affected Users to new Role(s) in conjunction with the deletion.
Introduction
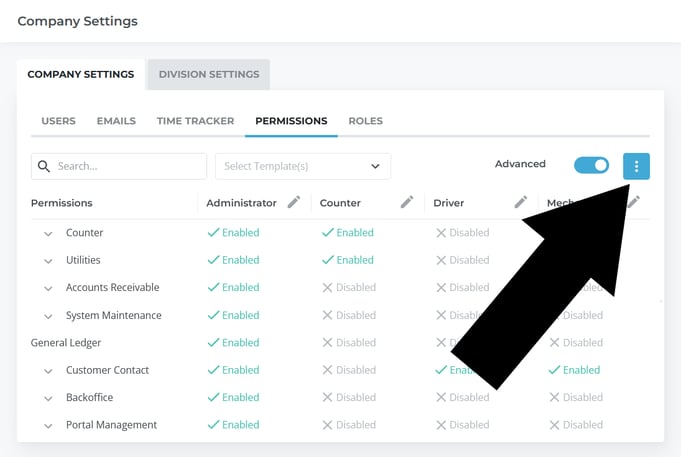 The Role Manager button shown in context on the Company Settings - Permissions page.
A User Role is a set of permissions that can be assigned to a User to give them access to various features throughout Texada SRM, Web, and Mobile. For example, the “Counter” Role might give a User access to the Contracts, Quotes, and Reservations modules; the “Mechanic” Role might enable a User to view and complete Work Orders. Roles are highly customizable, and multiple Roles can be assigned to a single User.
The Role Manager is a utility found in Texada Web that allows you to manage the User Roles in your system, including editing, cloning, deleting, and creating new Roles.
The Role Manager can be accessed by clicking the blue button with three vertical dots ![]() on screens where User Roles are displayed. There are currently 4 locations in Texada Web where this button can be found:
on screens where User Roles are displayed. There are currently 4 locations in Texada Web where this button can be found:
- The Permissions tab of the Company Settings Page:
User Menu → Settings → Company Settings → Permissions
- The Roles tab of the Company Settings Page:
User Menu → Settings → Company Settings → Roles
- When editing an existing User:
User Menu → Settings → Company Settings → Users → [click on a User] → User Permissions panel
- When creating a new User:
User Menu → Settings → Company Settings → Users → Create User → User Permissions panel
The Role Manager offers the same functionality regardless of how it is accessed. If you do not have sufficient permissions to manage User Roles, the Role Manager button will be grayed out and unclickable ![]() .
.
The Role Manager
Clicking the Role Manager button will open the following menu. Click on each option to jump to that section of the article.


- Clone: Create a new User Role using an existing Role as a starting point.
- Create: Create a new User Role from scratch.
- Edit: Modify a User Role.
- Delete: Delete a User Role.
Clone
This option allows you to create a new User Role using an existing Role as a starting point. This is useful if you want to create a Role similar to an existing Role, or if you want to experiment with modifying a Role’s permissions without affecting the Users currently assigned to that Role.
When you select “Clone” from the Role Manager menu, the following pop-up will appear, prompting you to select a Role to clone.

Once you have selected a Role to clone, click “Confirm” to proceed to the next step. From this point forward, the process is the same as when creating a new Role; see “Create” for the remaining steps.
Create
This option allows you to create a new User Role from scratch. When you select “Create” from the Role Manager menu, the following window will appear, allowing you to enter the details of the new Role. This creation screen is shared with the Clone option.
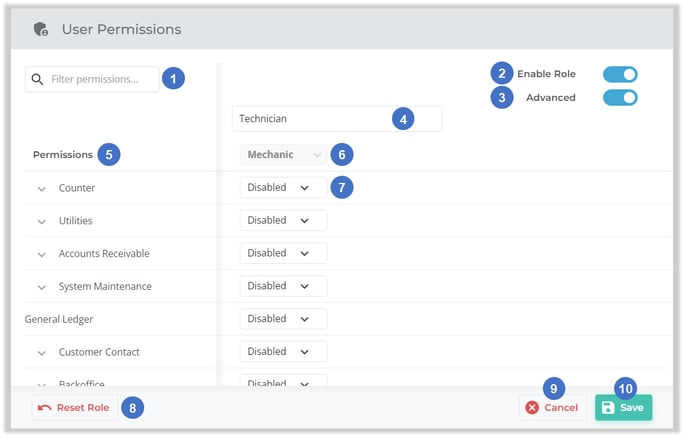
- Permission Filter
Begin typing here to filter the list of permissions by the text entered. This will search through all sub-levels of permissions, even those that are not currently visible. For example, searching for “counter” will return the “Utilities” permission, since “Counter Utilities” is a sub-level of that permission. - Enable / Disable Role Toggle
Use this toggle to enable or disable the Role. Disabled Roles can still be assigned to Users, but do not confer any permissions to those Users until they have been re-enabled. This feature is useful for testing the effects of removing a Role, or for temporarily disallowing Users from taking certain actions. - Advanced Toggle
Use this to switch the permission list between Simplified View and Advanced View. These views present the same permission information in different ways: Advanced View (toggle enabled) displays permissions in a style similar to the Security Role Permissions utility in Texada SRM, while Simplified View (toggle disabled) provides a more streamlined list. See “About User Roles and Permissions - Simplified View and Advanced View” for more information. - Role Name
The name of the new User Role. Role names must be unique. - Permissions List
Each permission is displayed in its own row. Permissions are organized into a hierarchy, with broader permissions at the top level containing sub-levels of increasing granularity. Click the down arrowto the left of a permission’s name to expand its sub-levels; click the up arrow
to the left of an expanded category to collapse it.
- Original Role Name
The name of the User Role upon which this Role is based. This field will only appear when using the Clone option. - Permission Selector
Use the drop-down next to each permission to select the Role’s level of access for that permission. The options available for each permission will change depending on whether you are using Simplified or Advanced View, as well as on the permission itself. See “About User Roles and Permissions - Simplified View and Advanced View” for more information. - Reset Role Button
Use this to undo any pending permission changes, reverting the Role to its original state. For new Roles, this will set all permissions back to Disabled. For cloned Roles, this will set all permissions back to those of the original Role. - Cancel Button
Close this window without saving any changes. - Save
Save your changes and exit.
Edit
This option allows you to edit an existing Role. Note that Role Templates cannot be modified; see “About User Roles and Permissions - Role Templates” for more information.
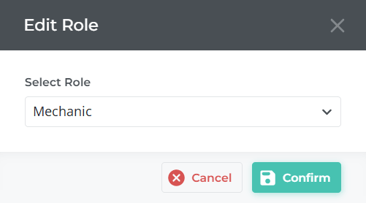
- When you first select this option, a pop-up will appear prompting you to choose the Role you want to edit. Select a Role and click “Confirm” to continue.
- If there are any Users currently assigned to the Role you have selected, the following pop-up will appear, listing those Users that will be affected by the changes you make. Click “Confirm” to continue, or “Cancel” to go back.
- From this point forward, the process is the same as when creating a new Role; see “Create” for the remaining steps.

Delete
This option allows you to delete an existing Role. Note that Role Templates cannot be deleted; see “About User Roles and Permissions - Role Templates” for more information.
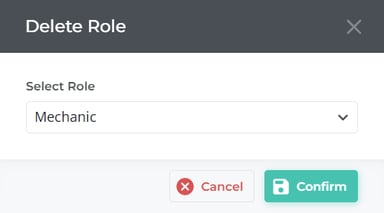
- When you first select this option, a pop-up will appear prompting you to choose the Role you want to edit. Select a Role and click “Confirm” to continue.
-
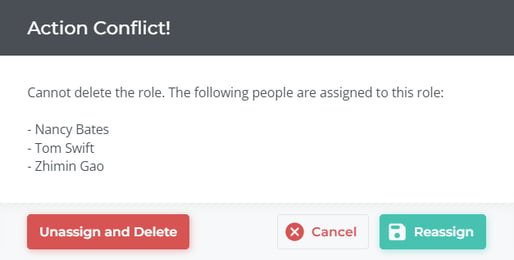
If there are any Users currently assigned to the Role you have selected, the following pop-up will appear, listing those Users that will be affected by the deletion. In order to proceed, you will need to choose how to handle those Users:
-
- To delete the Role and unassign all Users, click Unassign and Delete.
- To assign affected Users to new Roles, click Reassign. See “Role Reassignment” for more information.
- To cancel deletion, click Cancel.
Role Reassignment
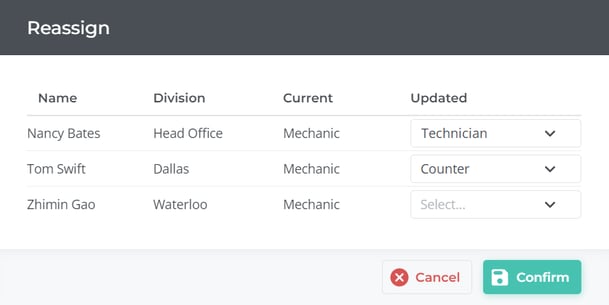
When deleting a Role that has assigned Users, select the “Reassign” option to open the below window, allowing you to assign a new Role to the Users affected by the deletion.
Use the drop-down menu next to each User’s name to select a new Role for that User. Once you are finished, click “Confirm” to delete the Role and reassign its Users.