
How to complete a Work Order or standalone Inspection in Texada Mobile.
Quick Reference
- Complete an inspection form when you need to carry out an inspection on an Asset.
- There are two types of inspections that can be carried out in Texada Mobile:
- Work Order inspections are completed as part of a Work Order.
- Standalone inspections are carried out on the spot as needed or mandated.
- To complete a Work Order inspection in Texada Mobile:
- Locate the Work Order for which you wish to complete an inspection.
- Navigate to the Inspection tab.
- Fill out the inspection form(s). Use the “Add Inspection” button to add additional forms to the inspection.
- Tap “Work Complete” to submit the Work Order.
- To complete a standalone inspection in Texada Mobile:
- Tap the hamburger icon
 in the top-left corner of the screen to open the user menu, then tap “Asset Management”.
 - Locate the Asset you wish to inspect, then navigate to the Inspections tab.
- Tap the green plus icon
 to start a new inspection.
 - Fill out the default inspection form, or tap “Add Form” to include additional forms.
- Tap “Submit” to add a signature and submit the inspection.
- Tap the hamburger icon
Introduction
Complete an inspection form when you need to carry out an inspection on an Asset. Sometimes inspections are mandated by your company, other times they are legally required by the government in your region.
There are two types of inspections that can be carried out in Texada Mobile:
- Work Order inspections are completed as part of a Work Order. See “About Work Orders in Texada Web and Texada Mobile" for more information on Work Orders.
- Standalone inspections are carried out on the spot as needed or mandated.
The actual contents of a given inspection form are determined by your SRM administrator. In SRM, administrators can select which inspection forms apply to which Assets, which questions are included on each form, and set a number of additional parameters, such as whether to automatically flag an Asset for repairs based on form responses. See “About Inspections” for more information on inspections.
Once completed, an inspection is permanently attached to the inspection history for that Asset, and can be reviewed at any time in SRM or Texada Web.
Completing a Work Order Inspection
A Work Order inspection is an inspection completed as part of a Work Order. These inspections must be completed before the Work Order to which they are assigned can be submitted.
Before you can complete a Work Order inspection, you must first claim the inspection. This is necessary when multiple technicians are working on the same Work Order and are completing different portions of the same inspection.
You can only complete inspections for Work Orders that are currently In Progress. If you have not yet started work on the Work Order, or if you have Paused the Work Order, you will need to begin or resume work in order to fill out an inspection form. See “About Work Order Statuses in Texada Web and Texada Mobile” for more information on Work Order statuses.
To complete a Work Order inspection form in Texada Mobile, follow the steps below.
- Launch the Texada Mobile app, then tap “
 Work Orders” to view the list of work orders currently assigned to you.
- Locate the Work Order for which you need to complete an inspection form and tap it to view its details. See “Browsing Work Orders in Texada Mobile” for more information on locating Work Orders.
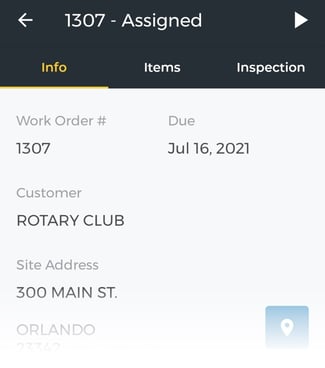
- Tap “Inspection” at the top of the screen to navigate to the Inspection tab. This tab contains a list of all the inspection forms associated with this Work Order; depending on the Work Order in question, there may be zero, one, or multiple inspection forms available.
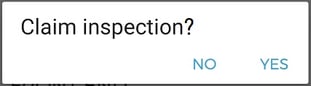
- Locate the inspection form you wish to complete and tap its name to start the completion process. A popup will appear prompting you to claim the inspection. Tap “YES” to claim the inspection and begin filling out the inspection form.
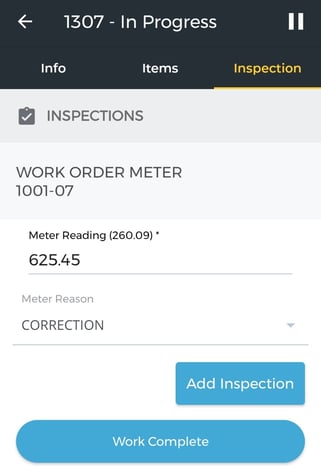
- Fill out the inspection form. When filling out inspection forms, keep the following in mind:
- Work Order inspection forms cannot be edited once the Work Order to which they are attached is complete, so it is important to be as precise as possible and to include as much information as you can.
- The fields that compose the form will vary based on the form in question. See “About Inspections” for a breakdown of the various field types.
- Depending on the form in question, some or all of the fields may be required. Required fields are marked with an asterisk (*).
- If you wish to complete multiple inspection forms before submitting the Work Order, repeat steps 4-5 for each additional inspection form.
- Once you have completed the inspection form(s), tap “Work Complete” to submit the Work Order. You will have a chance to review and modify your answers as part of the Work Order review process; see “Completing a Work Order in Texada Mobile” for more information.
Completing a Standalone Inspection
To complete a standalone inspection form in Texada Mobile, follow the steps below.
- Launch the Texada Mobile app, then tap the hamburger icon in the top-left corner of the screen to open the user menu.
- Tap “Asset Management” to navigate to the Asset Management screen.
- Locate the Asset for which you wish to complete an inspection, then tap it to navigate to its details page. This can be done one of two ways:
- Begin typing into the search bar to search the list of Assets by the text entered. This will search by Asset product number and description.
- Tap the barcode icon
 to open your device’s camera, then point it at the Asset’s barcode to scan it and retrieve that Asset’s record.
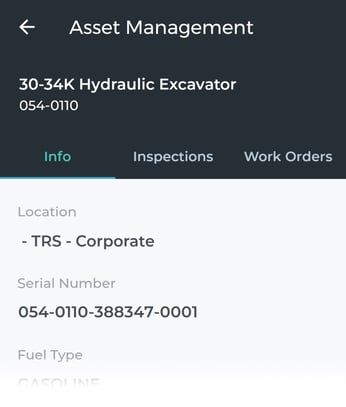
- Tap “Inspections” to navigate to the Inspections tab. This tab contains a record of all the inspections that have previously been completed for this Asset.
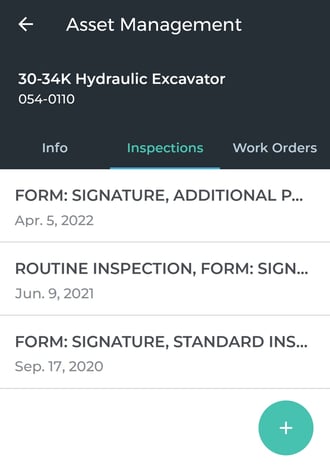
- Tap the green plus icon to open the Create Inspection screen. This screen will come pre-populated with the inspection form(s) that have been set as the default for this Asset by your SRM administrator. You can choose to either complete the default inspection form as-is, or use the “Add Form” button at the bottom of the screen to expand the inspection with other forms that exist in your system. Once you have added an additional form, you can remove it by tapping the “X” next to that form’s header.
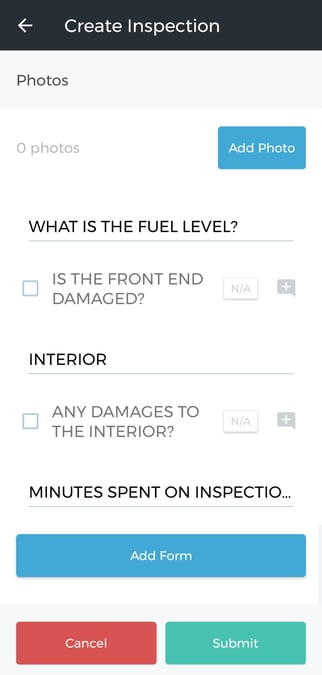
- Fill out the inspection form. When filling out inspection forms, keep the following in mind:
- Standalone inspection forms cannot be edited once they have been submitted, so it is important to be as precise as possible and to include as much information as you can.
- The fields that compose the form will vary based on the form in question. See “About Inspections” for a breakdown of the various field types.
- Depending on the form in question, some or all of the fields may be required. Required fields are marked with an asterisk (*).
- Once you have completed the inspection form, tap “Submit” to advance to the Review Inspection screen. On this screen, you will have a chance to review your responses to the inspection form. If you wish to make any changes, tap the back arrow
 in the top-left corner of the screen to return to the Create Inspection screen.
 - If you are satisfied with your submission, tap “Next” to advance to the Complete Inspection screen.
- Check the “Print a copy” box to print a copy of the inspection. If your device is not connected to any printers, this field will be disabled and will read (no printer available).
- Use the “Send email to:” field to send a PDF copy of the completed inspection to the email address specified.
- Add a digital signature to the inspection by drawing in the signature field. Tap the “Clear Signature” button to clear this field and try again.
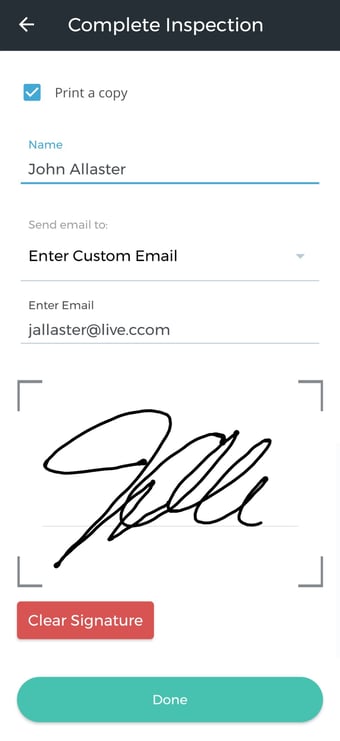
- Tap “Done” to complete and submit the standalone inspection form. If you selected “Print a copy”, a copy of the inspection will now be printed. If you selected “Send email to:”, a PDF copy of the inspection will now be emailed to the address specified.