How to add a maintenance code to an existing Work Order in the Texada Mobile application.
Quick Reference
- If maintenance codes for Work Orders are enabled in your system, all of the Parts, Labours, and Services you add to a Work Order in Texada Mobile will be organized by maintenance code. Add new maintenance codes to your Work Orders to ensure that billable items are logged in the correct place.
- In order to add a new maintenance code to a Work Order, you must be able to add at least one initial Part, Labor, or Service item under that code.
- To add a new maintenance code to a Work Order in Texada Mobile:
- Open Texada Mobile and locate the Work Order to which you wish to add a maintenance code. Ensure that the Work Order is in progress - you cannot add maintenance codes to Work Orders that have not been started or that have been paused.
- Navigate to the “Items” tab and scroll down to the bottom of the page.
- Tap “+Add Repair Code”.
- Select whether you’d like to add a Part, Labor, or Service item to the maintenance code, then follow the process of adding this item to the Work Order.
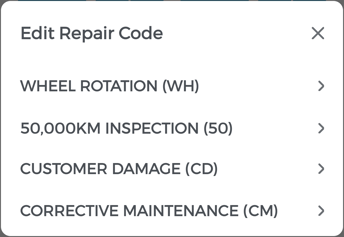
- While adding your item to the Work Order, ensure that you select the appropriate maintenance code from the Edit Repair Code drop-down.
- Once you have finished adding your item, both the item and the new maintenance code will appear under the Items tab of your Work Order. You can now tap the blue plus icons
 to add more Parts, Labour, and Service items under the new maintenance code.
Introduction
If maintenance codes for Work Orders are enabled in your system, all of the billable items under a Work Order (parts, labor, and services) will be organized by maintenance code. By adding new maintenance codes to your Work Orders, you can ensure that billable items are logged in the correct place.
The information in this article only applies to systems in which the “Prompt for Maintenance Codes on Work Order Details” option has been selected in Texada SRM. To verify whether this option is enabled in your system, navigate to the Items tab of a Work Order in Texada Mobile (Work Orders → [select a Work Order] → Items) and look for the “+Add Repair Code” button at the bottom of the screen. If this button is visible, maintenance codes are enabled in your system.
If you are an SRM administrator, the “Prompt for Maintenance Codes on Work Order Details” option can be found at System Maintenance → Configure System Settings → System → Company Parameters → Estimate and W.O. Parameters.
Adding a Maintenance Code to a Work Order
To add a maintenance code to a Work Order, follow the steps below.
- Open Texada Mobile and locate the Work Order to which you wish to add a maintenance code. See “Browsing Work Orders in Texada Mobile” for more information.
- Ensure that you have started work on your Work Order. You can only add maintenance codes to Work Orders that are currently in progress.
- Tap “Items” to switch to the Items tab.
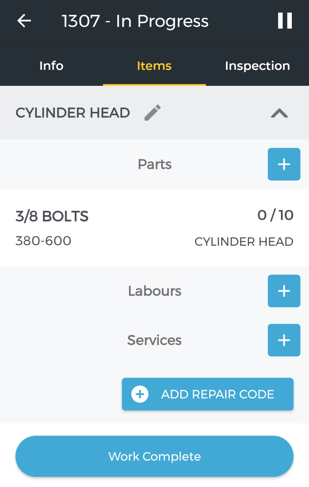
- Scroll to the bottom of the tab and locate the “+Add Repair Code” button. If this button is not visible, ensure that your Work Order is in progress - you cannot add repair codes to Work Orders that have not been started or that have been paused. If the Work Order is in progress and this button is still not visible, maintenance codes are not enabled for your system. Contact your SRM administrator if you believe this option should be enabled.
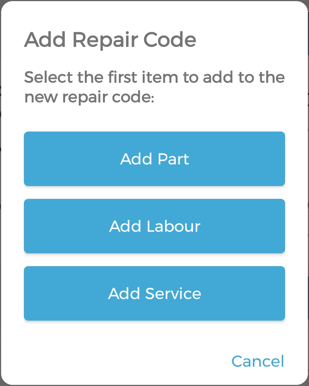
- Tap the “+ Add Repair Code” button. You will be prompted to add a Part, Labour, or Service to the Work Order. Select any one of these categories to proceed - new maintenance codes must be added with at least one item from one of these three categories.
- Texada Mobile will now walk you through the process of adding a Part, Labour, or Service to your Work Order, depending on the option you selected. For more information on this process, see the appropriate help article:
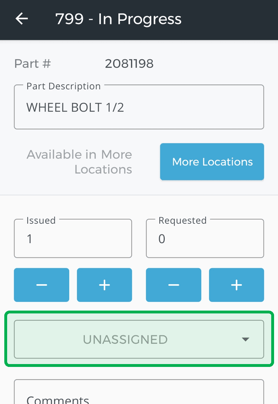
- While adding your item, ensure that you locate the repair code drop-down and select the repair code you wish to add to the Work Order. By default, this drop-down will read “UNASSIGNED”. Tap it to select a repair code from the list of codes defined for your system. Note that if you select a repair code that has already been added to this Work Order, your new item will be included under that repair code, and no new code will be added.
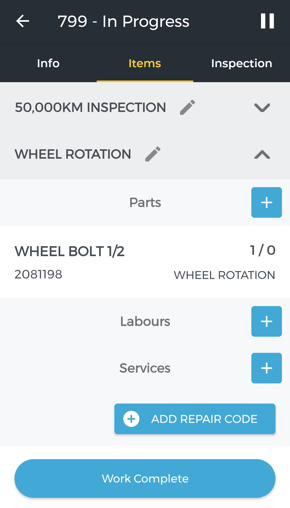
- Once you have finished adding your item to the Work Order, you will be taken back to the Items tab. Your new maintenance code will now be displayed here, along with the item you added to it. You can now use the blue plus icons next to the Parts, Labours, and Services headers to add more items under that maintenance code.