
In This Article
Introduction
Rental Management’s Check-In / Check-Out functionality allows yard workers to inspect Products and collect Customer signatures at the start and end of rental Contracts.
Check-Outs are performed at the beginning of a rental Contract, when the customer arrives to pick up rented equipment. Check-Ins are performed at the end of a Contract, when the customer returns equipment to the yard.
Both Check-Ins and Check-Outs can be processed via the Check-In / Check-Out screen in Service and Rental Mobile. The following article will outline this process.
Complete a Check-In or Check-Out
To complete a Check-In or Check-Out in Service and Rental Mobile, follow the steps below.
- Select a Customer and Product
Open the Check-In / Check-Out screen and search for a Customer (left). You can also tap the barcode icon to the right of the search bar to scan the barcode of the Product being returned. Once you’ve located the Customer you’d like to check in or out, tap to view their open Contracts. The Products included on each Contract will be listed below the Contract itself (right).
Tap on a piece of equipment to check it in or out. This will open the Inspection screen (step 2).
If you’d like to instantly check a Product in or out without inspecting it, tap the checkbox /
/ next to it. Note that, depending on your system’s configurations, not all Products can be checked out this way. If you encounter an “Item Can’t be Returned Automatically” error message, that means the Product needs to be inspected before it can be checked in or out.
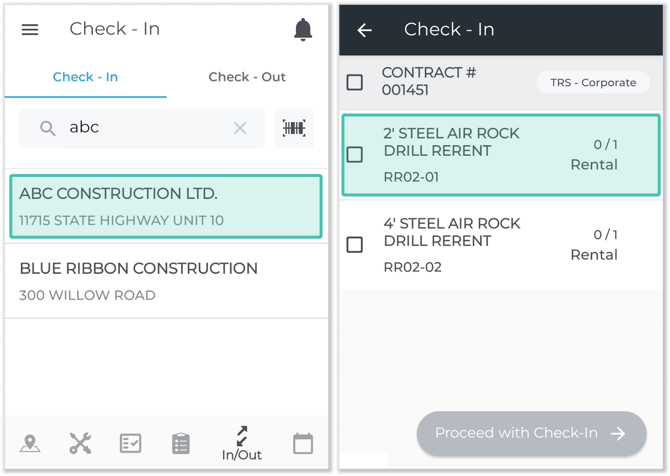
- Inspect Products
Fill out any Inspection forms associated with the Product you’re checking in or out (left). The required Inspection forms will differ based on the Product’s Group and on the Contract itself.
Tap “Add Photos” under the “Overview Photos” section to take photos of the Product.
Check the “Damaged” checkbox to flag the Product as damaged. this will reveal a “Damage” section, where you can take photos of the damaged area as well as select a damage code.
Once you are finished inspecting the Product, tap “Return Item”. This will return you to the list of Contracts and Products for the current Customer (right), with completed items indicated by a blue check mark .
.
You now have the option of repeating the inspection process for as many additional Products as you like. This feature allows you to process all of the Products for a single Contract, or even Products for multiple different Contracts, at the same time.
Once you are finished inspecting Products, tap “Proceed with Check-In / Check-Out” to finalize the Check-In / Check-Out process.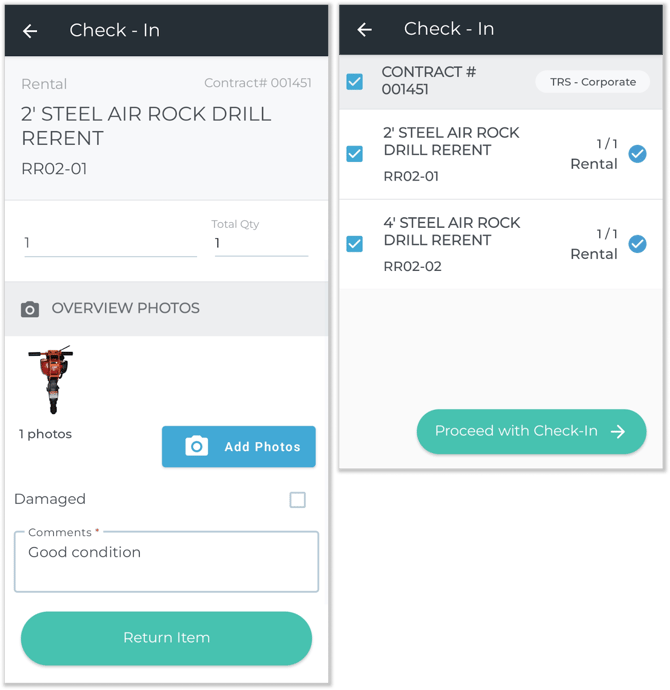
- Review and Sign
The review screen (next) provides a summary of the Products being checked in or out. Tap “Next” to continue, or tap the back arrow to go back.
Once you tap “Next”, you will have the opportunity to collect the Customer’s signature and complete Check-In/Check-Out process.
- Finished!
You’re done! Completed Check-Ins and Check-Outs will be sent to Rental Management (Next), where they can be reviewed and processed by counter staff. For more information, see: