How to add a photo to a Work Order, Ticket, Inspection, or In-Yard Return in Texada Mobile.
Quick Reference
- There are several screens throughout Texada Mobile that allow you to take a picture of an Asset using your device’s camera. This feature is generally used to confirm the condition of an Asset when opening or closing a document such as a Ticket or Work Order.
- To add a photo to a document in Texada Mobile:
- Open the document to which you’d like to add a photo and tap the “Add Photo” button
 (for most documents) or the photo icon
  (for Inspections).
 - Select Camera to take a new picture using your device’s camera, or Image Gallery to upload a picture from your device’s memory.
- Camera:
- If this is your first time using Texada Mobile to take a photo, tap “Allow” to give the application permission to use your device’s camera.
- Open the document to which you’d like to add a photo and tap the “Add Photo” button
-
-
- Tap the capture button
 to take a picture.
 - Depending on your device, you may be presented with a review screen displaying the picture you just took. Tap “Retry” to take another picture, or “OK” to accept.
- Tap the capture button
- Image Gallery:
- Tap an image from your device’s gallery to add it to the document.
-
Introduction
There are several screens throughout Texada Mobile that allow you to take a picture of an Asset using your device’s camera. This feature is generally used to confirm the condition of an Asset when opening or closing a document such as a Ticket or Work Order.
The following article will detail the process of adding a photo to a document in Texada Mobile.
The appearance and functionality of a mobile device’s camera and gallery features is dependent on the device’s model and operating system, and will therefore be different for every device. As such, the processes described in this article are intended as guidelines only.
Add a Photo
- Log in to Texada Mobile, then follow the instructions below depending on the type of document to which you’d like to add a photo:
- Work Order: Open the Work Order and make sure its status is In Progress, then scroll down to the bottom of the Info tab and tap the “Add Photo”
 button.
 - Ticket: Open the Ticket and make sure its status is Loading or Unloading, then scroll down to the “Assets” section. Tap on the Asset you’d like to take a picture of, then tap the “Add Photo”
 button.
 - In-Yard Return: Open the In-Yard Return, then tap the “Add Photo”
 button.
 - Work Order Inspection: Open the Work Order and make sure its status is In Progress, then switch to the Inspection tab and tap on any photo element included on an Inspection form
 .
. - Standalone Inspection: Access the Asset via the Asset Management tool in the User Menu. Switch to the Inspection tab and tap the green plus icon to create a new Inspection, then tap the “Add Photo”
 button. You can also tap the “Add Form” button to include an Inspection form that contains a photo element, then tap the photo icon
  .
.
- Work Order: Open the Work Order and make sure its status is In Progress, then scroll down to the bottom of the Info tab and tap the “Add Photo”
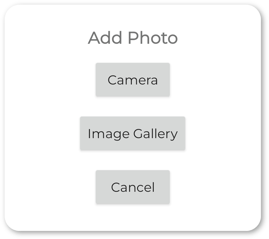
- The following pop-up will appear, prompting you to select whether to take a new picture or upload an existing picture from your device’s memory.
- Camera: Open your device’s camera and take a new picture.
- Image Gallery: Upload a picture from your device’s memory.
- Cancel: Cancel and return to the document.
Camera
This option allows you to take a new picture using your device’s camera.
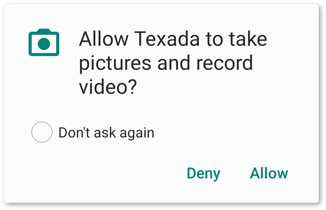
- If this is your first time using Texada Mobile to take a photo, the following pop-up will appear asking you to allow the application to take pictures and record video. Tap “Allow” to give Texada Mobile permission to use your device’s camera.
- Your device’s camera will now open (left). Use the controls at the top of the screen to adjust your camera’s settings, then tap the capture button
 to take a picture. Depending on your device, this may be followed by a review screen displaying the picture you just took (right). Tap “Retry” to take another picture, or “OK” to accept.
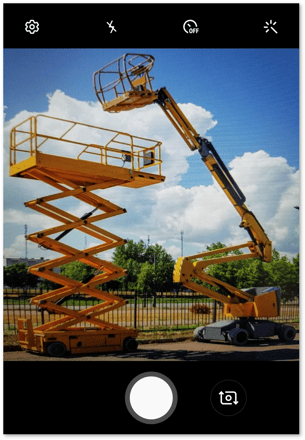
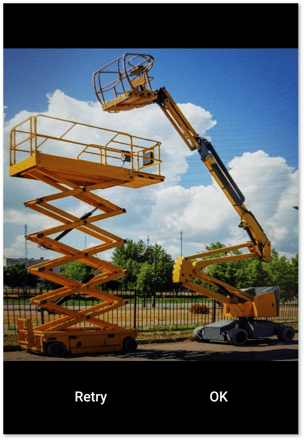
Image Gallery
This option allows you to add an existing photo from your device’s internal storage.
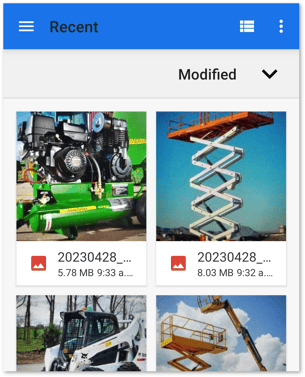
- Upon selecting this option, your device’s gallery will open. Tap on a picture to add it to the document.
Camera Tips

- Tap anywhere on the viewfinder to focus the camera on that area of the picture.
- If your camera is having trouble focusing, try moving further away from the subject.
- Tap the Settings button
 to adjust settings such as image resolution, HDR, auto-focus, and grid lines.
 - Tap the Flash button
 to activate or deactivate your camera’s flash.
 - Tap the Timer button
 to take a picture on a timer.
 - Tap the Wand button
 to add a filter to the picture.
 - Tap the Reverse button
 to switch between your device’s forward-facing and backward-facing cameras.
