
- Texada Knowledge Base
- Texada Web
- Settings
-
Top Searched Articles
-
Product Updates
-
Support & Troubleshooting
-
Onboarding Programs
-
Equipment CRM
-
Service Management
-
SRM
-
Handle
-
Analytics
-
E-Commerce
- Getting Started
- New Administration Panel
- Administration Panel
- Administration Panel - CMS
- Administration Panel - Products, Categories, and Attributes
- Administration Panel - Users
- Administration Panel - Requests
- Customer Access Portal
- Customer Access Portal - Rentals
- Customer Access Portal - Invoices
- eCommerce Websites
- eCommerce Websites - Ordering
- Integrations
-
Texada Mobile
-
Payments
-
Texada Web
-
Rental Asset Management
-
Order Fulfillment
-
Power Systems Projects
-
Equipment Quoting
-
Condition Monitoring Portal
-
Equipment Monitoring Toolkit
-
Parts and Service Quoting
-
Service Agreement Quoting
-
Equipment CRM - Additional Tools
The User Menu (Texada Web)
An overview of the User Menu in Texada Web.
Quick Reference
- The User Menu provides you with a number of important options for managing your Texada Web session, including:
- Switching Texada Web instances
- Clocking in and out
- Accessing the Company Settings page
- Switching to Texada SRM
- To open the User Menu, click on your name in the top-right corner of any page of Texada Web.
Introduction
The User Menu, accessible by clicking on your name in the top-right corner of Texada Web, provides you with a number of important options for managing your Texada Web session, including switching instances, clocking in and out, switching to Texada SRM, and accessing the Settings menu. The following article will cover all of the options available from the User Menu.
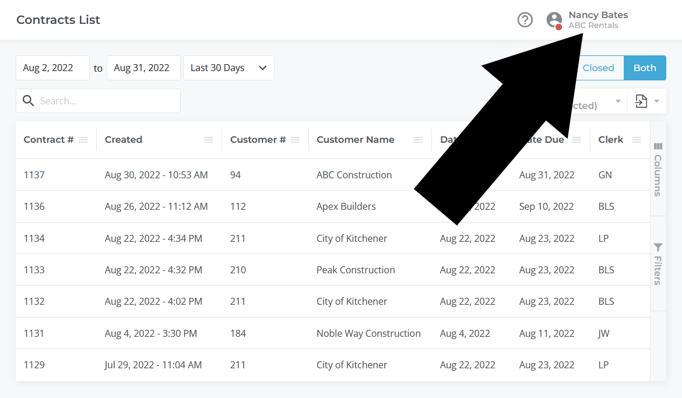 To reach the User Menu, click on your name in the top-right corner of Texada Web.
The User Menu
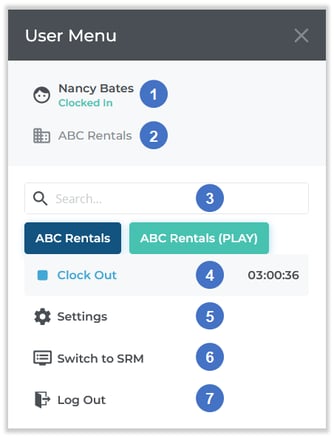
- User Name and Time Tracker Status
Your name and current Time Tracker status are displayed here. The Time Tracker status will read “Clocked In” or “Clocked Out” if the Time Tracker is or is not currently logging time, respectively. This is also displayed under your profile picture on every page when the User Menu is not open, as a green circle (clocked in) or a red circle (clocked out). - Current Instance
Your current Texada Web instance is displayed here. This is also displayed under your name on every page when the User Menu is not open. - Instance Switcher
If you have access to multiple Texada Web instances, you can use this option to switch between them. Click on an instance’s name to switch to that instance. Begin typing into the search bar to filter the list of instances. See “About Instances” for more information. - Time Tracker
The Clock In / Clock Out button is displayed here, along with the amount of time logged under the current session.- If you are currently clocked out, the button will read “
.png?width=12&name=Play%20Button%20(2).png) Clock In”. Pressing it will clock you in and start the Time Tracker. Your logged time for this session will begin incrementing from 0, and will continue to do so until you clock out or log out of Texada Web.
Clock In”. Pressing it will clock you in and start the Time Tracker. Your logged time for this session will begin incrementing from 0, and will continue to do so until you clock out or log out of Texada Web. - If you are currently clocked in, the button will read “
 Clock Out”. Pressing it will clock you out, stop the Time Tracker, and save the final logged time for the session. Completed sessions can be reviewed via the Time Tracker page. See “About the Time Tracker” for more information.
- If you are currently clocked out, the button will read “
- Settings Button
Use this to access the Company Settings page. See “The Company Settings Page” for more information. - Switch to SRM Button
Use this to open Texada SRM in a new browser tab. The instance of SRM that is opened will match your current Texada Web instance, as displayed at the top of the User Menu. - Log Out Button
Use this to log out of Texada Web. If you are clocked in, your session will be automatically ended and saved to the Time Tracker page.