
How to use the “Add New” feature to add a new Site when creating or editing a document in Texada Web.
Quick Reference
- In Texada Web, many types of documents are associated with a Customer record as well as a particular Site. When creating or editing one of these documents, you will have the option of selecting an existing Site to associate with the document, or creating a new Site.
- To add a new Site when creating or editing a document:
- Click the “Add New” button in the bottom-right corner of the Customer panel.
- Fill out the information of the new Site. You can use the search bar to search a list of valid addresses for the Site in question, or submit address information manually.
- Click “Save” to create the new Site and associate it with the document. If the “Save to Customer Account” option is selected, this new Site will also be saved to the Customer’s profile at this time. This option is only available if the document you are editing has an associated Customer record.
Introduction
In Texada Web, many types of documents are associated with a Customer record as well as a particular Site – either a Customer Site, a global Site, or a document-specific Site. When creating or editing one of these documents, you will have the option of selecting an existing Site to associate with the document, or creating a new Site.
The following article details the process of creating a new Site when creating or editing a document in Texada Web.
Affected Screens
The instructions in this article apply to the following screens in Texada Web:
- Work Orders:
- Contracts:
- Invoices:
Note that you cannot add a Site when creating or editing a Pickup, Delivery, or Task Ticket. This is because Pickup and Delivery Tickets inherit the Site of their parent Contract, while Task Tickets do not have an associated Site.
Add a New Site
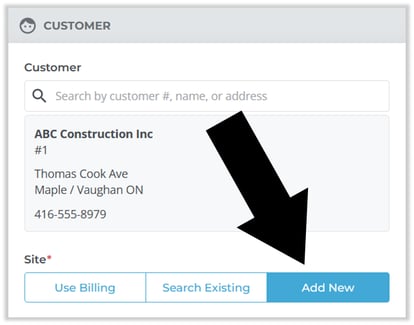
To add a new Site when creating or editing a document, click the “Add New” button in the bottom-right corner of the Customer panel. This will open the Add New Site window, where you can enter the details of the new Site and associate it with the document.
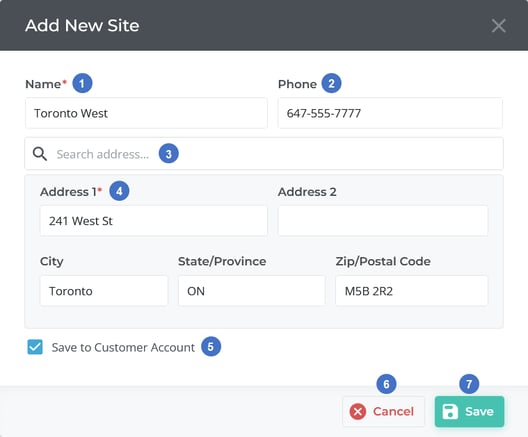
- Site Name
The name of the new Site. - Phone
A phone number for an on-site contact person. - Search Bar
Begin typing into the search bar to search a list of valid addresses for the Site in question. Once you have located the Site’s address, select it to automatically fill out the form with the available information. It is highly advisable to use this feature whenever possible, as it will ensure the Site’s address information is accurate. - Address Information
Once an address has been selected from the search results, its information will appear here. Alternatively, you can enter address information directly into these fields. - Save to Customer Account Toggle
Check this box if you want to save this new Site to the Customer’s profile. If this option is not selected, this Site will only be associated with the current document, and will not be saved in the system.
This option will only be available if the document you are editing has an associated Customer record. To associate a Customer with the document, begin typing into the search bar at the top of the Customer panel, then click on the desired Customer record once you have located it in the list. - Cancel Button
Close this window without saving any changes. - Save Button
Save this new Site information to the document and close this window. If “Save to Customer Account” is selected, this new Site will also be saved to the Customer’s profile at this time.