
All about the User Menu in Texada Mobile.
Quick Reference
- The User Menu in Texada Mobile provides you with a number of important options for managing your session, including:
- Changing your Division or Location
- Clocking in and out of the Time Tracker
- Accessing the Asset Management tool
- Logging in to Texada Web
- To open the User Menu, tap the hamburger icon
 in the top-left corner of any main screen in Texada Mobile. If you are in the Asset Management tool or are looking at a Ticket, Work Order, or In-Yard Return, you will need to back out of that tool before you are able to access the User Menu.
Introduction
The User Menu, accessible by tapping on the hamburger icon ![]() in the top-left corner of Texada Mobile, provides you with a number of important options for managing your Texada Mobile session, including the ability to change your Division and Location, clock in and out of the Time Tracker, access the Asset Management tool, and log in to Texada Web. The following article will cover all of the options available from the User Menu in Texada Mobile.
in the top-left corner of Texada Mobile, provides you with a number of important options for managing your Texada Mobile session, including the ability to change your Division and Location, clock in and out of the Time Tracker, access the Asset Management tool, and log in to Texada Web. The following article will cover all of the options available from the User Menu in Texada Mobile.
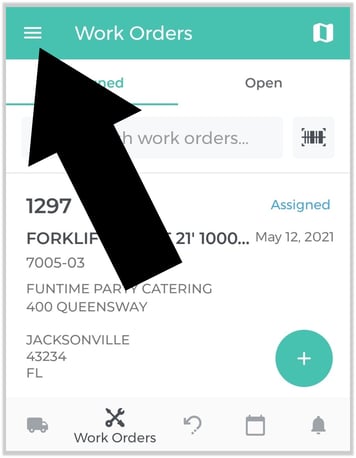 To reach the User Menu, tap on the hamburger icon
 ![]() in the top-left corner of the screen. Note that this menu is only available from the main screens of Texada Mobile; if you are in the Asset Management tool or are looking at a Ticket, Work Order, or In-Yard Return, you will need to back out of that tool before you are able to access the User Menu.
in the top-left corner of the screen. Note that this menu is only available from the main screens of Texada Mobile; if you are in the Asset Management tool or are looking at a Ticket, Work Order, or In-Yard Return, you will need to back out of that tool before you are able to access the User Menu.
The User Menu
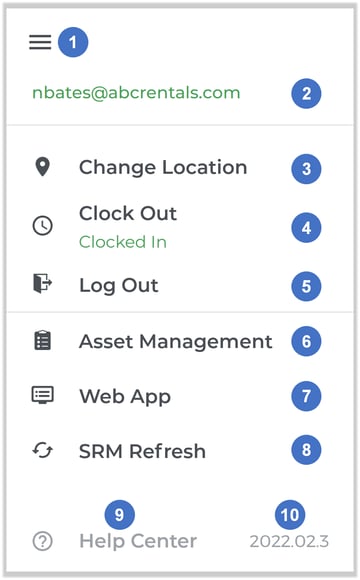
- Hamburger Icon
Tap the hamburger icon again to close the User Menu. - User Email Address
The current User’s email address. If you are clocked in, your email address will be displayed in green. Otherwise, it will be displayed in black. - Change Location Button
Tap to change your active Location and Division. See “Change Location and Division in Texada Mobile” for more information. - Clock In / Clock Out Button
Tap to clock in to the Time Tracker, or clock out and save your session if you are already clocked in. See “Clock In and Out of Texada Mobile” for more information. - Log Out Button
Tap to log out of Texada Mobile. See “Log In and Out of Texada Mobile” for more information. - Asset Management Button
Tap to access the Asset Management tool. See “Asset Management” for more information. - Web App Button
Tap to log in to Texada Web from your mobile device. This is a powerful feature that allows you to access functionality specific to Texada Web without needing to leave Texada Mobile. Once you are finished with Texada Web, tap the back arrow in the top-left corner of the screen to return to Texada Mobile.
See “Access Texada Web from Texada Mobile” for more information. - SRM Refresh Button
Tap to synchronize Texada Mobile with Texada SRM. Texada Mobile automatically synchronizes with SRM whenever you perform an action such as updating a Ticket, Work Order, or In-Yard Return, but you can use this button to manually trigger the process and ensure that Mobile is fully up-to-date. - Help Center Button
Tap to open the Texada Knowledge Center on your mobile device. Once you are finished browsing the knowledge center, tap the back arrow in the top-left corner of the screen to return to Texada Mobile. - Current Version
Your current version of Texada Mobile is displayed here. Keeping Texada Mobile updated to the latest version is required to run the app. See “Download, Install, and Update Texada Mobile” for instructions on keeping Texada Mobile up-to-date.