.png?width=365&height=50&name=Texada%20Logo%20(Black).png)
Quick Reference
- Service Agreement Quoting allows you to build out Quotes for equipment servicing, and track their status through initial creation to approval to CVA Contract creation.
- To create a new Quote in Service Agreement Quoting:
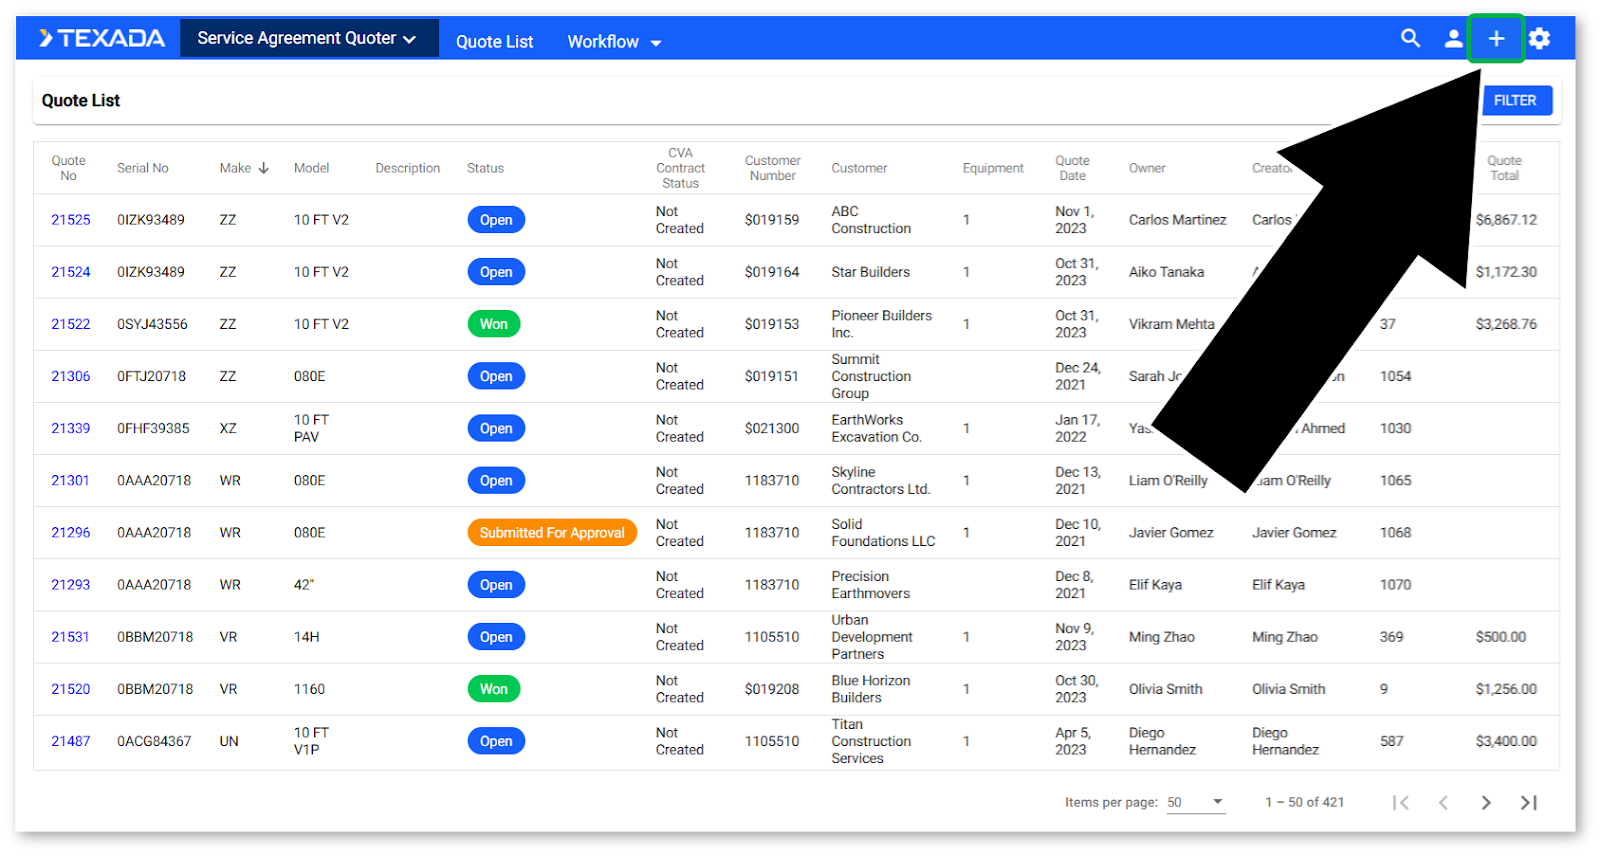
- Click the plus icon
in the top-right corner of any screen in Service Agreement Quoting.
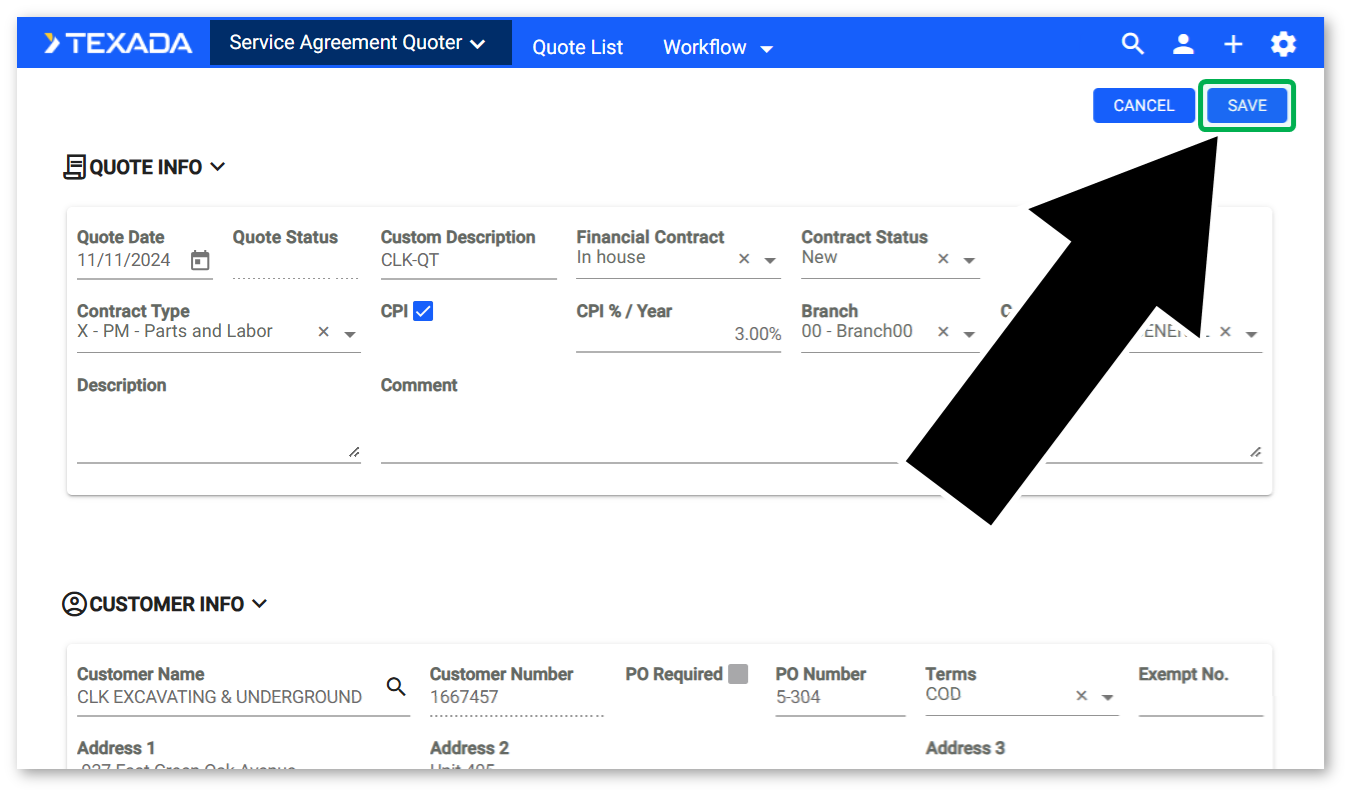
- Fill out all the basic information for the Quote, including at minimum a Quote Date, Contract Type, Owner, Branch, Customer, and at least one Customer Contact. Ideally, the “Package” drop-down should be used to select a Package for the Quote. Once you are finished, click the “Save” button in the top-right corner of the screen.
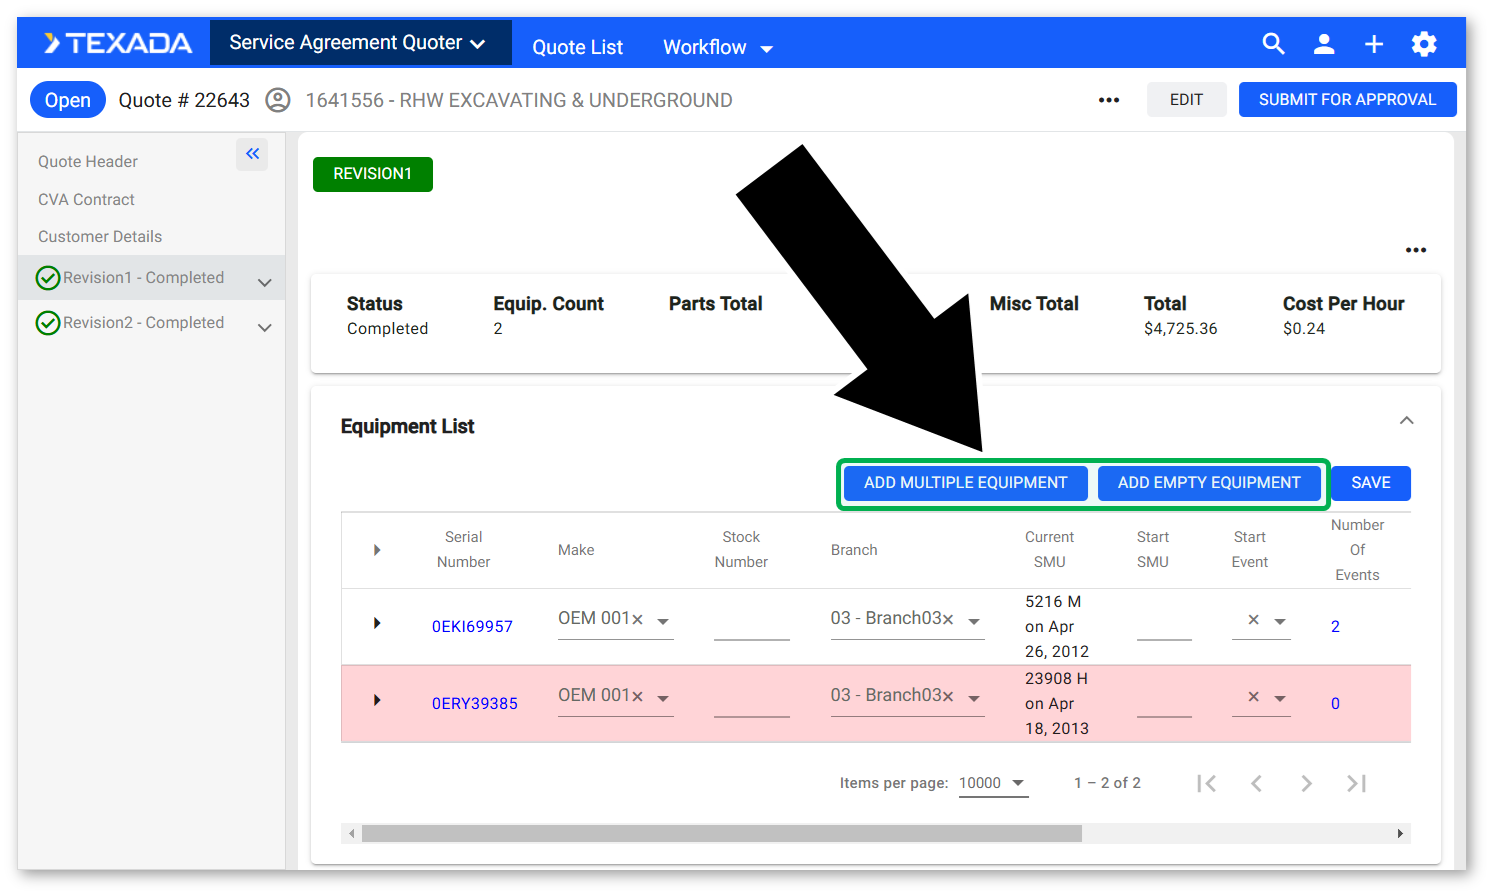
- Add equipment to your Quote by selecting a Revision from the left navigation menu, then clicking the “Add Multiple Equipment” or “Add Empty Equipment” buttons.
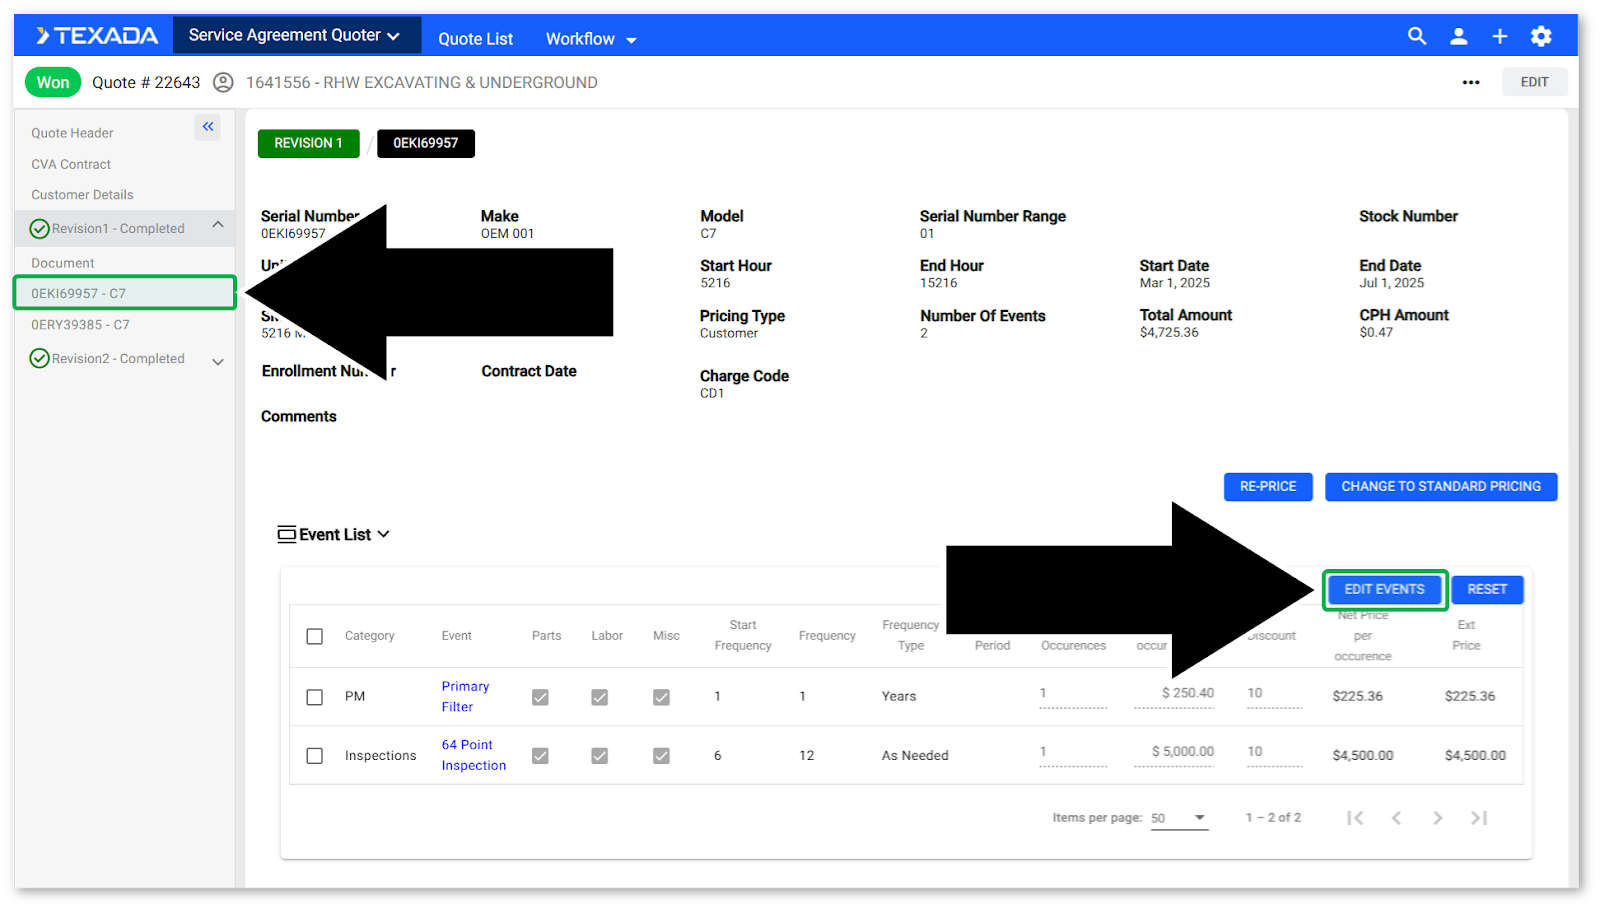
- Add Events to a piece of equipment by clicking its serial number in the left navigation menu, then clicking the “Edit Events” button.
- Edit an Event for a piece of equipment by clicking its serial number in the left navigation menu, then clicking the Event’s name (highlighted in blue) in the Event List.
- Once the Quote has been won, click the “Create Contract” button in the top-right corner of the Quote Details page to create a CVA Contract for the Quote. Click “CVA Contract” in the left navigation menu to edit the CVA Contract, then click the “Send to ERP” button to send the Contract to your ERP system.
- Click the plus icon
Introduction
The primary function of Service Agreement Quoting is to build out Quotes for equipment servicing, and to track their status through initial creation to approval to CVA Contract creation. The following article outlines the process of creating a new Quote in Service Agreement Quoting.
Create a Quote
To create a quote in Service Agreement Quoting, follow the steps below.
- Start a New Quote
Click the plus icon - Fill out Quote Information
On the Create Quote screen, fill out the basic information for the Quote. At minimum, a Quote Date, Contract Type, Owner, Branch, Customer, and at least one Customer Contact must be selected.
Ideally, the “Package” drop-down should be used to select a Package for the Quote. Packages are a powerful tool that allow you to quickly build out Quotes based on pre-defined bundles of Events. For more information, see “Manage Events in Service Agreement Quoting”. Packages are configured via the Packages screen (administrators only).
For a breakdown of all the elements on the Create Quote screen, see “The Create Quote Screen”. Many of the fields on this screen can have default values set via the Personalize screen. These defaults can always be overwritten at the time of Quote creation.
Once you are finished filling out the details of your Quote, click the “Save” button in the top-right corner of the screen to create it. - Add Equipment
After clicking the “Save” button, you will be automatically redirected to the Quote Details page. Specifically, you will be taken to the Revision Details subscreen of the Quote’s initial Revision.
You can now add equipment to the Quote. Scroll down to the Equipment List panel and click the “Add Multiple Equipment” button to open the Equipment Search window and select equipment to add to the Quote. You can also click the “Add Empty Equipment” button to manually fill out the information for a piece of equipment.
Once you are finished adding equipment to the Quote, click the “Save” button to save your changes. - Manage Equipment and Add Events
Once you have added one or more pieces of equipment to your Quote, you can manage each piece of equipment individually, and add Events to be completed for each piece.
To do this, first navigate to the Equipment Details screen by clicking on the equipment’s serial number in the left navigation menu. Scroll down to the Event List panel and click the “Edit Events” button to modify the Events for that piece of equipment.
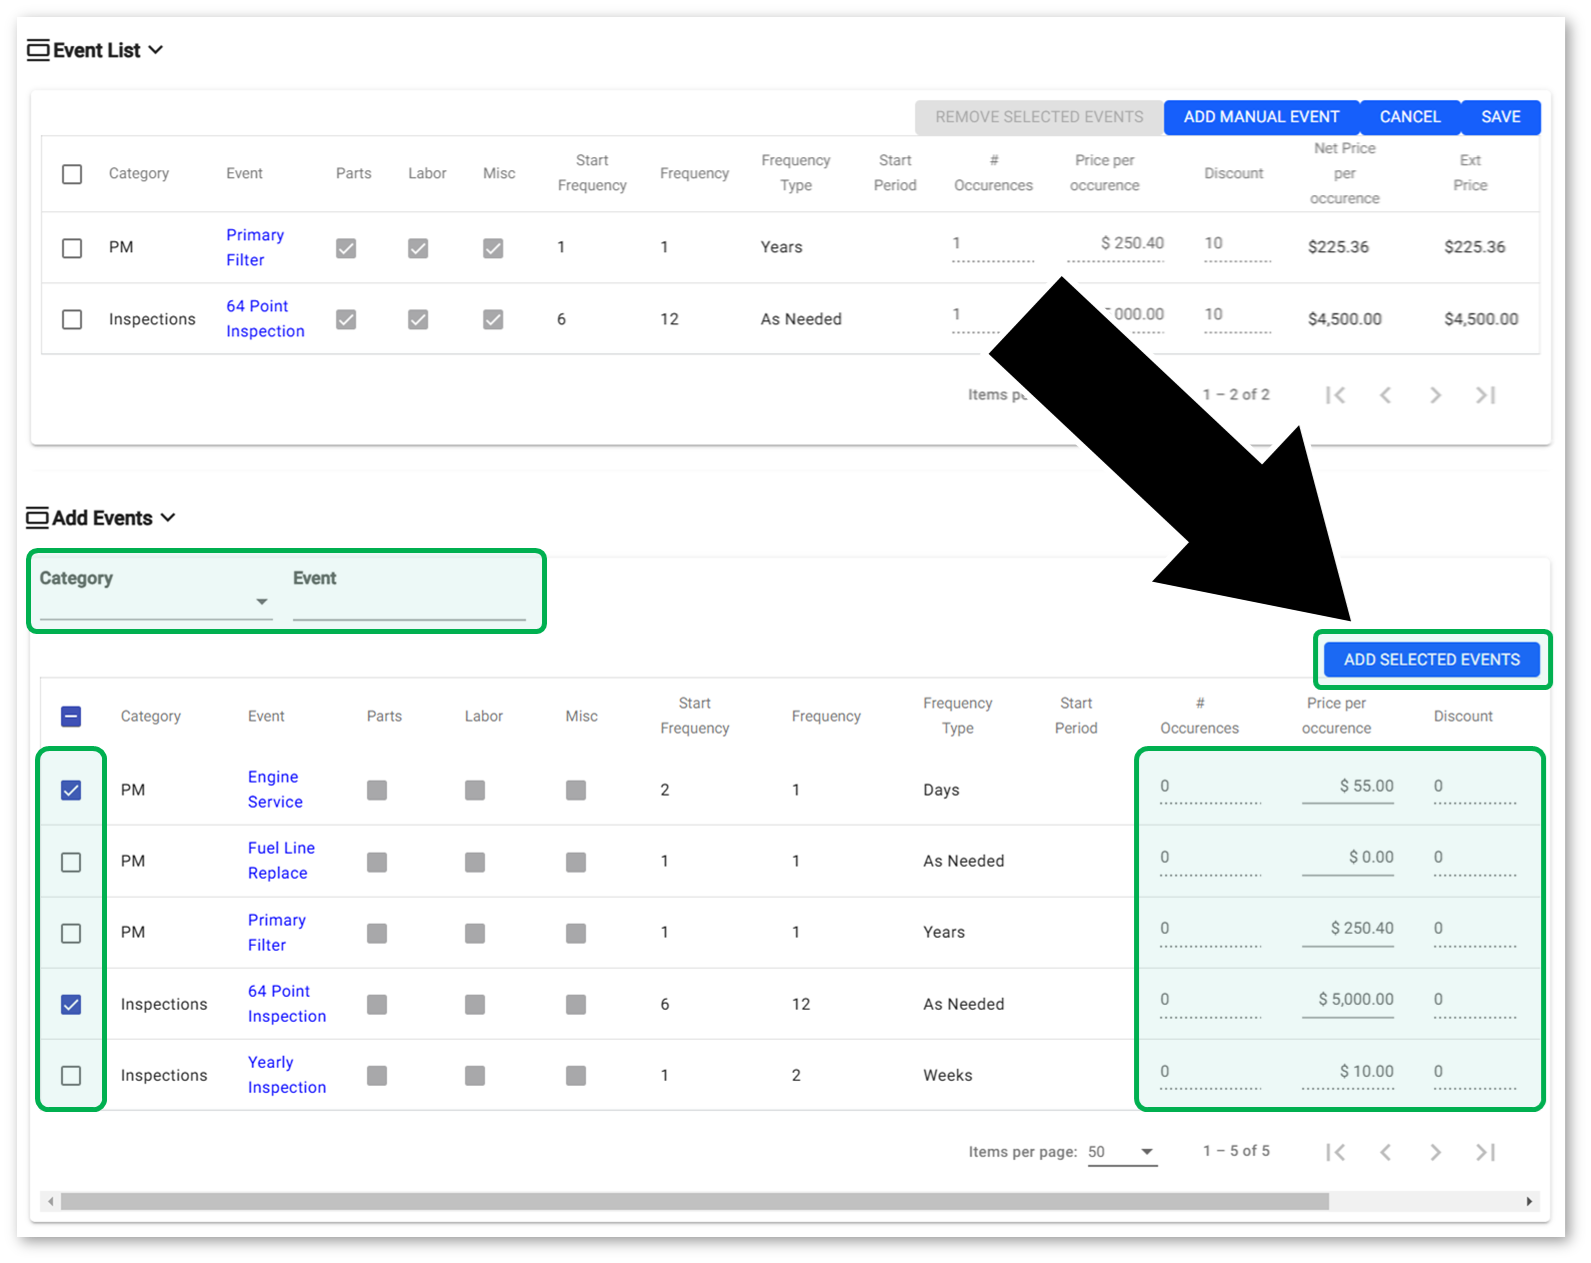
Use the “Category” and “Event” filters at the top of the Add Events panel to filter the list of available Events. Once you have located the Events you want to add, select them using the checkboxes on the left side of the panel. For each Event, you can edit the number of occurrences, the price per occurrence, and apply a percentage discount. Once you are finished, click “Add Selected Events” to add the Events to the piece of equipment. - Manage Events
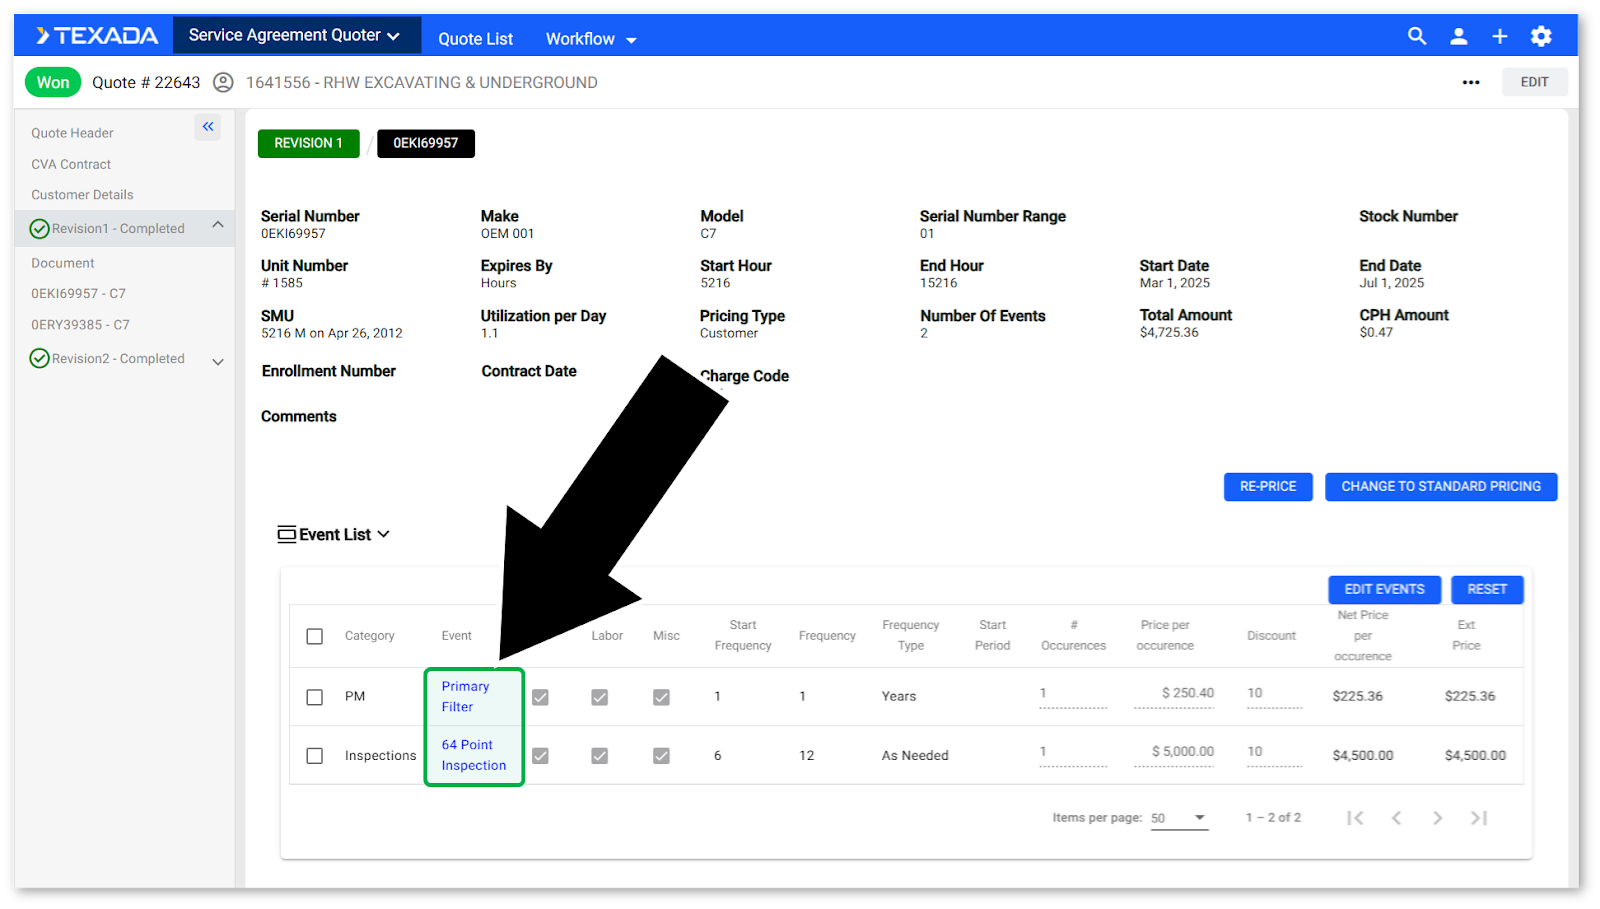
The individual Events added to a piece of equipment on a Quote can also be managed. To do this, click on the Event’s name (highlighted in blue) in the Event List. This will take you to the Event Details screen, where you can edit the Event’s header, financials, and Parts, Labor, and Misc components. - Create and Send CVA Contract
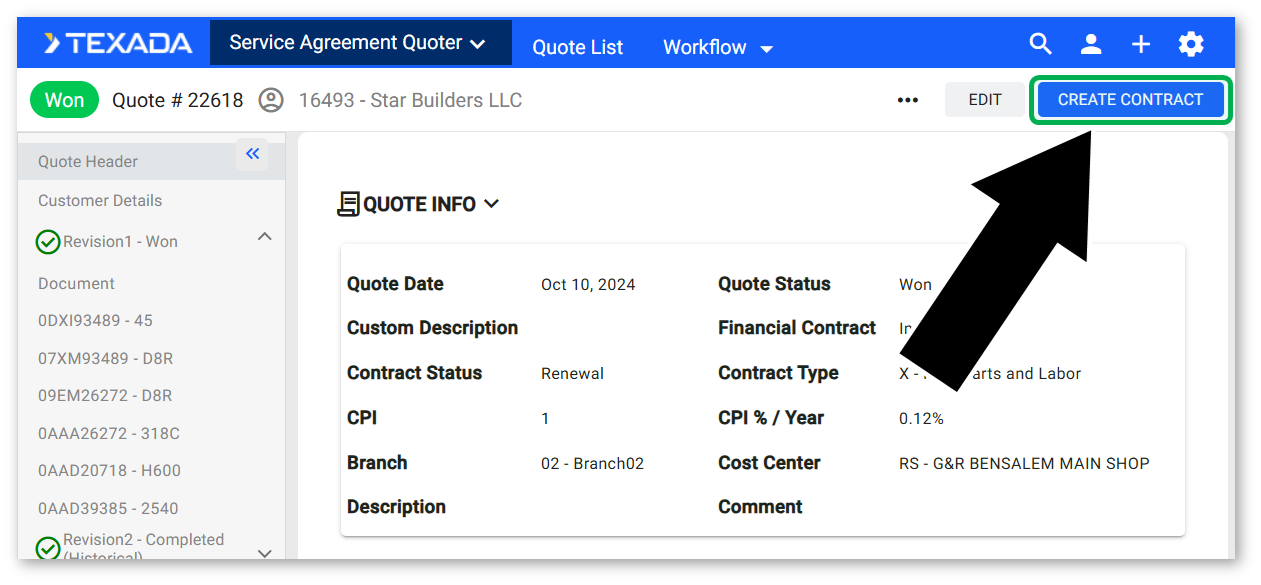
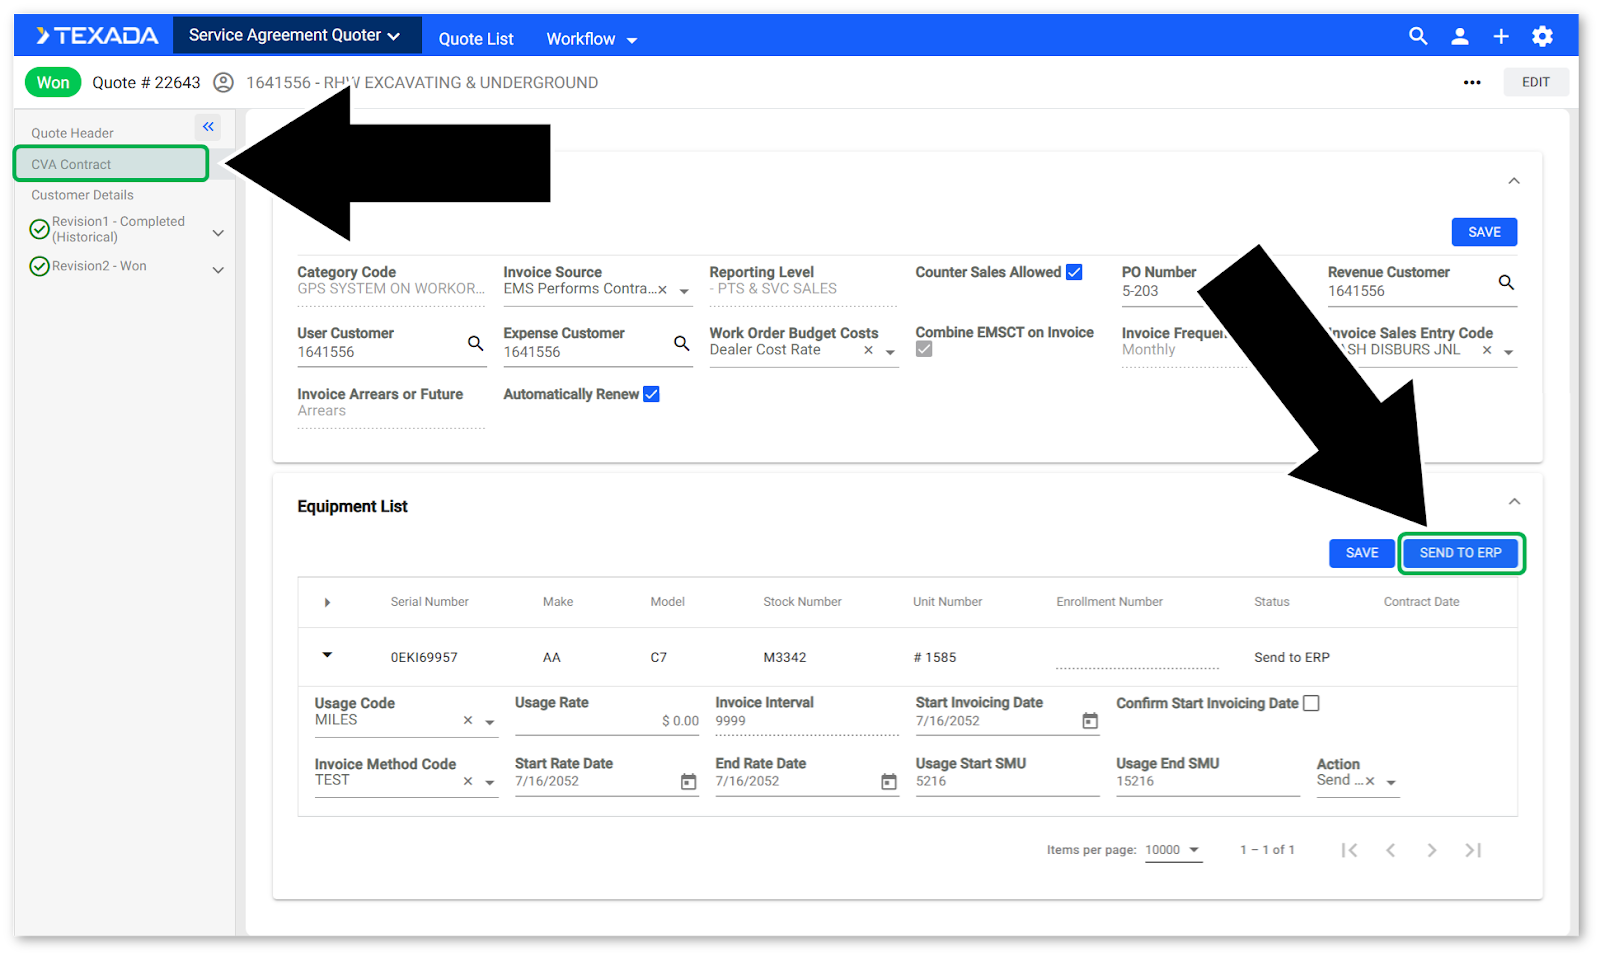
Once a Quote has been won, you can click the “Create Contract” button in the top-right corner of the Quote Details page to create a CVA Contract for the Quote. This will add a “CVA Contract” option to the left navigation menu. Click this option to view and manage the CVA Contact associated with the Quote. For a breakdown of all the elements on the CVA Contract screen, see “The Quote Details Screen - CVA Contract”.
Once you are satisfied with the contents of the CVA Contract, you can send it to your ERP system by clicking the “Send to ERP” button in the top-right corner of the Equipment List panel.